It's not about resolution. It's not about detail. Heck, it isn't even about the size of the photo...
Then what is it about?
 My simplest answer is simply... Because I enjoy it. There is a frustration and a sheer amount of joy when shooting with a large format camera. When you set up your shot, you have nothing to take the measurements for you. The light has to be measured just right, then you have to take into account for the aperture, and even the bellows draw, before you can even take your photo.
There are no auto exposure large format cameras. The weight of the camera is something else, too. Almost like the phrase.. "DEAD WEIGHT" ... you feel that way when you are carting around a monorail. Even Field Cameras get heavy after a while, and I'm sure a Press Camera doesn't get any lighter the longer you're carrying it.
One of my most prized cameras is my Deardorff 5x7 1950's Chicago original camera. Originally owned by my late grandfather, it has, sadly, gone into disrepair, and is not in the best of conditions.
Lack of proper storage, lack of care, and
moisture has not been its friend. Stored in a basement that suffered from moisture and mold, it did not fair wonderfully.
 It would have been nice if there was more to it than what there is. You can see it in the photo above.
Everything about Large Format is big. Big film... Big lenses.. Big cameras...
And ultimately, big times for each exposure.
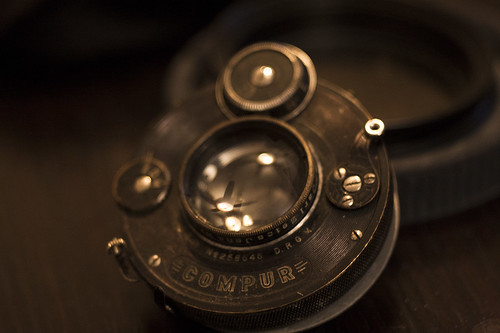
Just to show you a basic idea on the size of the lenses, I put a roll of 35mm film beside my Schneider 210mm lens.
As you can see, it's far from small!
The lens in the background is a Agfa Anastigmat Apotar 105mm ƒ/4.5
When I'm out in the field with my 4x5, I have to set up each shot meticulously, and slowly. Focusing is an art! Sure, with a 35mm camera or a 120 camera you are much closer to the view screen, and can easily focus, a large format camera requires a bit more finesse. A magnifying Loupe works great! I have a folding Magnifying Loupe to critically focus and make sure what I want sharp, is sharp.
Also, weather becomes a factor.
Sure, you have the image composed how you want it. You've adjusted the camera to keep all the lines straight that you want straight, focus is perfect and you've set you aperture and shutter speeds.
Film is ready to be exposed and you trip the shutter...
But you have to wonder.. "Did the light change from when you set the shutter and aperture? Did the wind blow and shake the camera during the exposure? Did you properly compensate for bellows draw?"
You won't know until you get back to develop the image and see the final negative.
 |
| Left - Agfa Anastigmat Apotar 105mm ƒ/4.5 Right - Schneider-Kreuznach Symmar 210mm ƒ/5.6 |
Such as Bellows Factor. When you're at "INFINITY" you don't have to worry about your bellows factor, but the closer you focus the more you have to take into account for bellows draw.
I use an app on my smartphone to calculate bellows draw, but it can be done in your head or with a bit of math.
The other thing is Image Circle. Just because you're using a Large Format lens doesn't mean you will get a full image circle. Adjust the front for rise, and add a bit of tilt and you run the risk of losing your image circle.
I've shot a few images where I've lost part of my circle simply because I added too much rise, and gave a bit of a shift and lost the lower corner of my image, which was too bad, but it did add to the image.
It can be quite frustrating when you load the film into the holder, get the camera set up, and pull the slide out only to find that the film drops out of the holder because you missed getting the film under the rails on both sides.
It's happened a few times to me, unfortunately.
But it's always a learning experience!
Heading out in the field can be quite the challenge too, with the weight of a monorail and tripod braced against your shoulder.
I have a Duffle bag that I use to cart my camera to and from a location and the car. But once set up, it's carried via my tripod and braced on my shoulder.
The bag carries my film holder and my lenses.
When people see me they either have no idea what I'm doing, and many times they pull out their cellphone and take a photo or three of me. The other thing they do is start blabbing to me, asking me questions about the camera and where I buy the film for it.
 What it really comes down to is that I completely enjoy using my large format camera in every aspect. Sure, it is not the easiest method to capture images, nor is it the lightest.
Errors are compounded by the fact that you don't get a do-over. One shot, one chance. After the image is taken, you cannot capture the same image again. If you didn't get it, you didn't get it. You cannot try again for the exact same image, you'll simply have to move on and go to the next.
Recently I went out on a photowalk with my good friend +Alex Luyckx who is one of the few that understand the enjoyment of "Large Format" photography.
Other photographers, such as +Andrew Koran, +Mathew Marrash, +Holger Drallmeyer and +Kelly-Shane Fuller also understand Large Format enjoyment.
It's funny how when I first started shooting film I'd blow through several rolls of film a week, but as I got more experienced I started slowing down more and more. Eventually I found myself shifting from 35mm to medium format and large format.
Taking my time from image to image I was finding that 35mm was too long to finish each roll. 120 was a nice balance for image quality, lower exposures per roll, and let me slow down and take my time from image to image.
But I still find that it's too many frames... I'm looking for a 6x9 camera so I can slow down even more, but still be portable.
But when I want to really slow down, and really get the shot I want... I shoot Large Format.
There's a building I've been working in (I'm an electrician by trade, but love the art of photography) and there's an absolutely beautiful retention pond. After having to temporarily satisfy myself shooting the photos with my cellphone and with a Brownie Hawkeye (not to mention my Argus C3) and a Spotmatic and even my Voigtlander Vito CL, I got out there with my Monorail.
I set up, and shot a set of 4 exposures. 2 shots on some expired (1977) Kodak TXP320 (Tri-X Pan 320) and 2 shots on Kodak Ektar 100.
My first shot with my 4x5 was on Kodak Ektar using my Agfa Anastigmat Apotar 105mm ƒ/4.5 (see photo above) while the second Ektar shot was using a Kodak Ektar 127mm ƒ/4.7 lens.
When I set up a shot it can take a few minutes, or more..
One image I set up took about 5 minutes from the time I had the camera up on its tripod to time I had the image composed and focused, it was over in the blink of an eye..
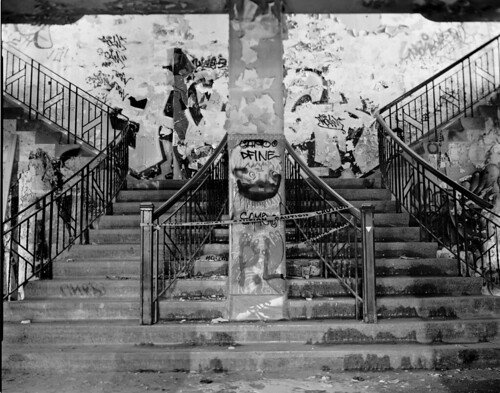
In 1/15s I had the image recorded to film, and it was one of the few times (like the image of the stairs above) I knew I had the shot as I wanted it..
There was no wind, no motion in the camera at all, and I had the shot..
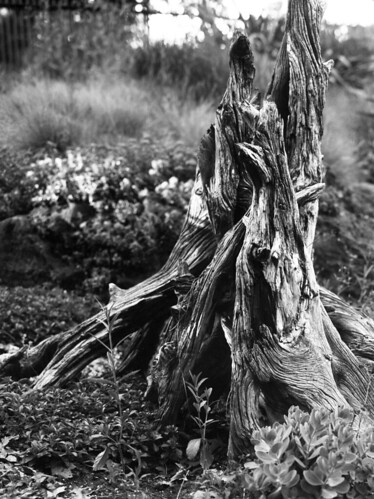 It gave me a strange sense of satisfaction to get the photo exactly as I wanted it.
Only taking 5 minutes was also quite the surprise, as the latest image I have taken took more than 40 minutes from start to finish to take.
I got the camera set up in only a matter of moments, but the light wasn't right.
It's amazing how waiting for the sun to reach the right spot in the sky to give me the right colour of light, the right intensity and the best reflection off the glass of a building, can take so long.
I had to satisfy myself with using my Spotmatic and Vito to take a few random shots around the area where the 4x5 would just be showing off.
So I waited... and waited.. and waited
Finally the sun was giving me the right amount of light, was in the right spot.. and I knew I only have a few minutes to get the photo..
So I cocked the shutter, pulled the darkslide, and tripped the shutter...
I know I've got the shot how I wanted it... But currently the image is ... waiting for development..
The Ektar will be sent out to Borealis lab in Quebec, while the Tri-X Pan will be developed in either Caffenol-C or HC-110 Dil. B....
I have yet to decide fully..
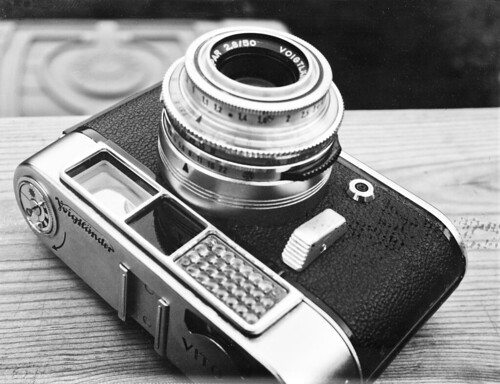
For now, I'll have to be satisfied with the images I took using my Voigtlander Vito CL and Spotmatic.
As it stands right now, I'm only moderately satisfied with the Vito and Spotmatic images, but my Brownie images completely blow them away, for the most part.
Although it can be quite trying to shoot 4x5 (or larger) film, and rather daunting, there is a satisfying feel to it. You get some remarkable image resolution out of it, and incredible enlargements should you so choose.
My fellow shooters know that for detail and resolution you cannot beat large format.
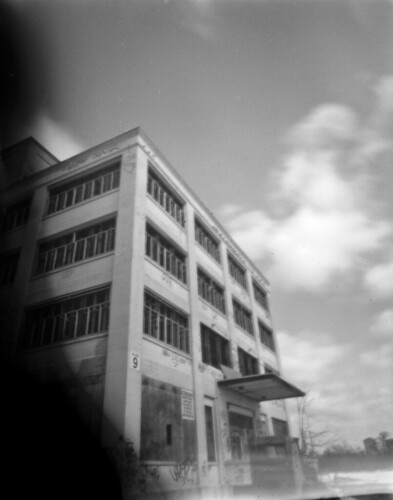 But that's not why we shoot it. No, that is not at all the reason whatsoever. If it was all about sharpness, detail and resolution, why would anyone in their right mind shoot Pinholes with 4x5?
They do. In fact, so have I! The image to the right was shot with a homemade Pinhole lensboard using nothing more than my original Calumet metal lensboard, some tinfoil, electrical tape, and a piece of wire thread to poke the hole.
That's it.. and here's an image created using nothing more than a super small hole, and the mindset to create it.
There's no automation with creating these images. It's just you, the camera, your film and knowledge, a bit of chance and your light meter. Keeping notes is a very valuable asset, especially when it comes to development. N+2?! Or was it.. N-1?! Oh yes, film holder 1-2 loaded with Fuji Acros 100... July 10th.... Here it is..
Okay, Develop as normal, good...
When you have multiple film holders, this is a very good habit to have. Keep notes! Not only will it help you keep track of each shot you take and how to develop them, but will also help you stay organized and disciplined.
I'm never going to say that Large Format is for everyone. In fact, it's definitely not for everyone. People who prefer to shoot small formats, and like the fact that you can shoot many images and have multiple chances to get that "image" will be better off not shooting 4x5 or larger, but those that find 35mm or even 120 a little too quick, well... Large Format photography might be for you!
One thing is for certain... I got the bug.. and I got it bad!
So bad, in fact, I'm actually pulling lenses on Quarter Plate cameras, 116 cameras, 616 cameras and even 6x9 cameras for their lenses to use on 4x5!
Every time I see an old Kodak Folder I check.. "Oh do I have that lens?" or... "I wonder if that'll give me full coverage....
All in all, I will not stop shooting large format. I find myself shooting more and more lately. After the last photowalk where I went with Alex to the University of Toronto campus in Downtown Toronto, I blew through the most frames of 4x5 I have ever gone through in a day.. Actually both him and I both did!
He claims 8 sheets of film, while I claim 10. Sadly I mucked a couple, but it's all in the enjoyment of shooting..
Oh, and speaking of old Kodak Folder lenses...
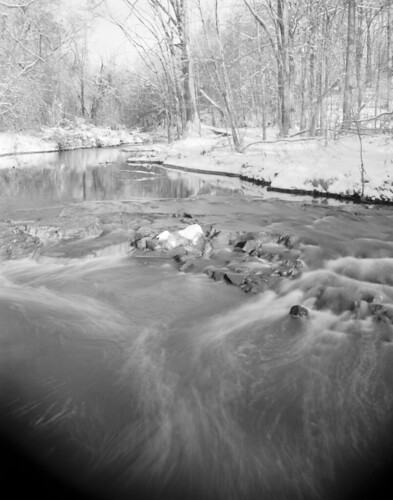 Not bad, I think for a 100 year old Rapid Rectilinear lens off an old Kodak Autographic Brownie that used to use 116 film!
In fact, I would have to say, this makes for one hell of an enlargement! I happen to have made one on 11x14 Silver Gelatin paper.. Absolutely stunning! Sadly, however, it's still not quite big enough. I think, perhaps, 16x20 is in order! At least it'd be without cropping!
For now, I'll have to remain satisfied with the monorail, as I am too funded out to get my Deardorff restored, but it'll be a wonderful project, and a beautiful (and stunning) camera once it is finished.
So until the next time... Keep those shutters firing!
I have a Duffle bag that I use to cart my camera to and from a location and the car. But once set up, it's carried via my tripod and braced on my shoulder.
The bag carries my film holder and my lenses.
When people see me they either have no idea what I'm doing, and many times they pull out their cellphone and take a photo or three of me. The other thing they do is start blabbing to me, asking me questions about the camera and where I buy the film for it.
What it really comes down to is that I completely enjoy using my large format camera in every aspect. Sure, it is not the easiest method to capture images, nor is it the lightest.Errors are compounded by the fact that you don't get a do-over. One shot, one chance. After the image is taken, you cannot capture the same image again. If you didn't get it, you didn't get it. You cannot try again for the exact same image, you'll simply have to move on and go to the next.
Recently I went out on a photowalk with my good friend +Alex Luyckx who is one of the few that understand the enjoyment of "Large Format" photography.
Other photographers, such as +Andrew Koran, +Mathew Marrash, +Holger Drallmeyer and +Kelly-Shane Fuller also understand Large Format enjoyment.
It's funny how when I first started shooting film I'd blow through several rolls of film a week, but as I got more experienced I started slowing down more and more. Eventually I found myself shifting from 35mm to medium format and large format.
Taking my time from image to image I was finding that 35mm was too long to finish each roll. 120 was a nice balance for image quality, lower exposures per roll, and let me slow down and take my time from image to image.
But I still find that it's too many frames... I'm looking for a 6x9 camera so I can slow down even more, but still be portable.
But when I want to really slow down, and really get the shot I want... I shoot Large Format.
There's a building I've been working in (I'm an electrician by trade, but love the art of photography) and there's an absolutely beautiful retention pond. After having to temporarily satisfy myself shooting the photos with my cellphone and with a Brownie Hawkeye (not to mention my Argus C3) and a Spotmatic and even my Voigtlander Vito CL, I got out there with my Monorail.
I set up, and shot a set of 4 exposures. 2 shots on some expired (1977) Kodak TXP320 (Tri-X Pan 320) and 2 shots on Kodak Ektar 100.
My first shot with my 4x5 was on Kodak Ektar using my Agfa Anastigmat Apotar 105mm ƒ/4.5 (see photo above) while the second Ektar shot was using a Kodak Ektar 127mm ƒ/4.7 lens.
When I set up a shot it can take a few minutes, or more..
One image I set up took about 5 minutes from the time I had the camera up on its tripod to time I had the image composed and focused, it was over in the blink of an eye..
In 1/15s I had the image recorded to film, and it was one of the few times (like the image of the stairs above) I knew I had the shot as I wanted it..
There was no wind, no motion in the camera at all, and I had the shot..
It gave me a strange sense of satisfaction to get the photo exactly as I wanted it. Only taking 5 minutes was also quite the surprise, as the latest image I have taken took more than 40 minutes from start to finish to take.
I got the camera set up in only a matter of moments, but the light wasn't right.
It's amazing how waiting for the sun to reach the right spot in the sky to give me the right colour of light, the right intensity and the best reflection off the glass of a building, can take so long.
I had to satisfy myself with using my Spotmatic and Vito to take a few random shots around the area where the 4x5 would just be showing off.
So I waited... and waited.. and waited
Finally the sun was giving me the right amount of light, was in the right spot.. and I knew I only have a few minutes to get the photo..
So I cocked the shutter, pulled the darkslide, and tripped the shutter...
I know I've got the shot how I wanted it... But currently the image is ... waiting for development..
The Ektar will be sent out to Borealis lab in Quebec, while the Tri-X Pan will be developed in either Caffenol-C or HC-110 Dil. B....
I have yet to decide fully..
For now, I'll have to be satisfied with the images I took using my Voigtlander Vito CL and Spotmatic.
As it stands right now, I'm only moderately satisfied with the Vito and Spotmatic images, but my Brownie images completely blow them away, for the most part.
Although it can be quite trying to shoot 4x5 (or larger) film, and rather daunting, there is a satisfying feel to it. You get some remarkable image resolution out of it, and incredible enlargements should you so choose.
My fellow shooters know that for detail and resolution you cannot beat large format.
They do. In fact, so have I! The image to the right was shot with a homemade Pinhole lensboard using nothing more than my original Calumet metal lensboard, some tinfoil, electrical tape, and a piece of wire thread to poke the hole.
That's it.. and here's an image created using nothing more than a super small hole, and the mindset to create it.
There's no automation with creating these images. It's just you, the camera, your film and knowledge, a bit of chance and your light meter. Keeping notes is a very valuable asset, especially when it comes to development. N+2?! Or was it.. N-1?! Oh yes, film holder 1-2 loaded with Fuji Acros 100... July 10th.... Here it is..
Okay, Develop as normal, good...
When you have multiple film holders, this is a very good habit to have. Keep notes! Not only will it help you keep track of each shot you take and how to develop them, but will also help you stay organized and disciplined.
I'm never going to say that Large Format is for everyone. In fact, it's definitely not for everyone. People who prefer to shoot small formats, and like the fact that you can shoot many images and have multiple chances to get that "image" will be better off not shooting 4x5 or larger, but those that find 35mm or even 120 a little too quick, well... Large Format photography might be for you!
One thing is for certain... I got the bug.. and I got it bad!
So bad, in fact, I'm actually pulling lenses on Quarter Plate cameras, 116 cameras, 616 cameras and even 6x9 cameras for their lenses to use on 4x5!
Every time I see an old Kodak Folder I check.. "Oh do I have that lens?" or... "I wonder if that'll give me full coverage....
All in all, I will not stop shooting large format. I find myself shooting more and more lately. After the last photowalk where I went with Alex to the University of Toronto campus in Downtown Toronto, I blew through the most frames of 4x5 I have ever gone through in a day.. Actually both him and I both did!
He claims 8 sheets of film, while I claim 10. Sadly I mucked a couple, but it's all in the enjoyment of shooting..
Oh, and speaking of old Kodak Folder lenses...
In fact, I would have to say, this makes for one hell of an enlargement! I happen to have made one on 11x14 Silver Gelatin paper.. Absolutely stunning! Sadly, however, it's still not quite big enough. I think, perhaps, 16x20 is in order! At least it'd be without cropping!
For now, I'll have to remain satisfied with the monorail, as I am too funded out to get my Deardorff restored, but it'll be a wonderful project, and a beautiful (and stunning) camera once it is finished.
So until the next time... Keep those shutters firing!


