 |
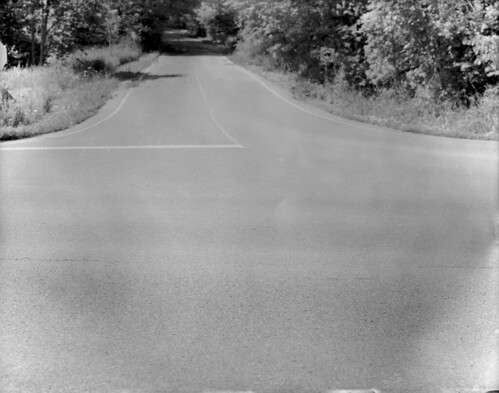
| Calumet CC400 4x5 Monorail - Schneider-Symmar 180mm ƒ/5.6 @ ƒ/16 - 11:48PM August 1, 2017 1s Exposure - Rollei RPX25 - HC-110 Dil. B 5:00 20°C |
Showing posts with label Large Format. Show all posts
Showing posts with label Large Format. Show all posts
Saturday, August 5, 2017
Empty Road
I took this photo as I have passed this spot several times, almost every single day to be exact, have wanted to shoot it very similar to how I did, however the issue has always been a matter of 'how to shoot it' and 'how to frame it'. I decided on having the road into the forest to be out of focus and the T junction to be in focus. I find that the back elements being in focus and the front elements, such as the road, if it was out it wouldn't have the same effect. At least in my mind, plus I didn't like how it looked when I had tested that in camera. It would have been a huge challenge to shoot this in 35mm the same way as I'm sure the focusing would have been a real trick and I doubt I would have got the same effect out of focus as I would here. Especially at around ƒ/16 or so, as I was here. Maybe the image isn't quite what I had in mind, but it's pretty close. I'll have to try this again when the fogs return.

Thursday, May 29, 2014
Why I Shoot Large Format...
So there is a question put out there by some friends of mine.
Also, with +Alex Luyckx and +Mathew Marrash, who have both been asked similar questions, I have wondered this very thing myself.
Why do I shoot Large Format...
It's a complicated question, that is not easily answered. One reason I can think of, is quite simple. It is very relaxing. I enjoy shooting formats like 35mm, and 120.. but there is something that feels too fast about those formats. In a "never stop, never slow-down" world, I like the fact that there's something that cannot be done quickly.
When you shoot colour, it takes on a whole different dimension. The detail begins to pop right out.
Colour takes on a whole new depth, and the clarity is unobtainable through any other means. Sure, it's only 4x5, but if you take a look at a regular printed photograph that you get from your Local Walmart, from a digital or 35mm print, you'll notice that the print dimensions are 4x6.
Now imagine a negative, or a transparency, that is basically taken on a sheet of film that is just 1" narrower
than the 4x6 print.
To this day, I still remember the very first time I got my hands on my 4x5 Monorail. Browsing the Kijiji website, I just so happened upon someone who was selling a Calumet CC400 with lensboard, case, 5 film holders, a pack of Fuji Provia 100F, and some other various stuff for a very inexpensive price.
All I needed was a lens, and I was ready to go!
So I popped onto that great auction site and got myself a Schneider-Kreuznach Symmar-S 210mm ƒ/5.6 Linhof lens for a price that I have never found again.
After I got the lens I designed, and made, my own lensboard. Painting the front Red, it really made it stand out. The lensboard takes in the "Calumet" red dot logo and blends it seamlessly with the surrounding Bluish-Gray finish of the rest of the camera.
It really looks quite sharp! Those that have seen the lensboard always remark at how lovely it looks.
The next lens I picked up was an old Kodak Ektar 127mm ƒ/4.7 Wide-Angle lens, commonly found on a Speed Graphic, such as what +Alex Luyckx has. It has such a wide image circle, that I think it'll even cover 5x7 film! It gives me movements on 4x5, and like many Kodak lenses, is incredibly sharp.
But that doesn't necessarily answer the question as to why I shoot large format. And as I said, it's not a question easily answered.
Lets look at it a different way. Why not shoot large format? Well, simple. The gear is heavy, cumbersome, expensive, and not easy to transport.
There are film holders, different lenses and boards, big heavy tripods, and enough movements to make your head spin.
But at the same time, when you are shooting a 35mm camera, or even that dSLR, you have a very limited perspective to think of. Where, I find, Large Format lets you take a whole different perspective when shooting.
You can shoot at an angle, and by adjusting your lens angle you can get straight lines and correct perspectives.
Plus, you slow down.
In a world where the digital camera can fire off 30 frames in a few seconds, the large format camera lets you stop, relax, and focus.
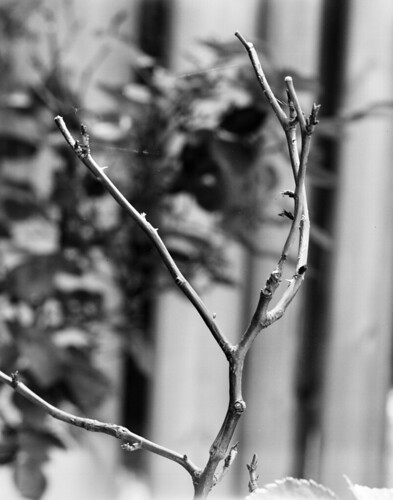
This image is probably a prime example of slowing down. From start to finish it took me no less than 2 hours to get it set up. After focusing I had to measure off the bellows and calculate the bellows factor. That means adding stops to represent the amount of light lost from the lens to the film-plane due to the bellows extension. This is done using a tape measure, or a guesstimate, of the lensboard to the film plane. A 210mm lens will have a bellows draw of 210mm from the film plane to the lens at infinity. This is the normal factor for the lens. While you extend it beyond 210mm you have to increase the number of stops of light for your exposure. Thankfully, instead of doing a bunch of math either in my head, or on paper, I have an app for that on my phone (yes there is an App for just about everything!).
Then you have to take a light reading. Well, when I took this, the sun was blasting down through the sky and blowing some parts of the image out. I was shooting a transparency after all, and wanted some of that powerful light to be behind some clouds. So I waited.... and waited... and waited....
After what seemed an eternity (was just short of two hours) I found the sunlight starting to wane.. then finally that harsh glaring light softened down.
Quickly taking a ready, and factoring in the bellows draw, I dialed in the settings on my lens, and the shutter.
Loading the film holder, drawing out the darkslide, then releasing the shutter, I knew I had the image I was after.
It was then that disaster struck. I forgot to label the holder properly, or note it in my book what was loaded.
So I ended up with this film being loaded into the tank along with many other B&W sheets to be processed in HC-110 Dil. H.
Sure enough, however, the image is nothing less than amazing. Super smooth, and incredibly well toned! I couldn't have gotten a better image if I tried.
It almost feels like it just works better in B&W than it ever could in colour.
My wife complains at times when I take the 4x5 our on a walk. "Why are you taking that thing for?? It's so big and heavy, and takes you forever to take a single photo!"
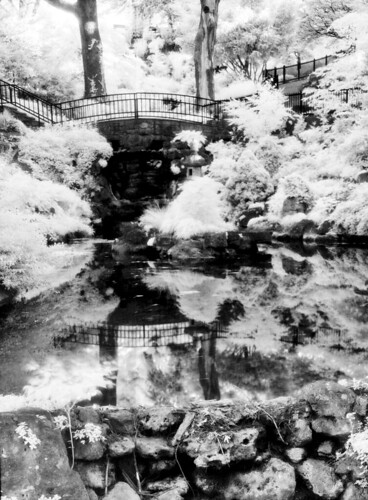
Well, again, you slow down, and you really pay attention to what you are going to take a photo of. When I was at High Park, I imagined this water garden all aglow in IR light.
The image in my mind was perfect...
I lined it up in the camera, stopped down the lens, and just envisioned it.
Metering the shot as best as I could, I got the shutter ready and released it....
Tick... tick.... tick... tick.... 45 seconds ticked by....... then finally 90 seconds was reached, which was right on the money for what I metered for, and I closed the shutter....
I knew instantly that i had exactly what I was after...
Sure enough, the image, when I got the film developed, popped out and stared at me. The negative was just beautiful!
My very first IR image had been captured.. Unlike many others who shot their first IR on 35mm or even 120.. I did it on 4x5! And I was absolutely in love with IR! So much so that I bought a roll of Efke IR 820C in 35mm... It makes you slow down as well, shooting IR.
Then there is the old lenses that you find on old Kodak Folders, or the old Rapid Rectilinear lenses, or even Achromatic lenses.
These are dual element lenses that are either cemented together (Achromatic) or separated by a pocket of air (Rectilinear). The difference is that the Rectilinear lenses are actually convertible. Remove one of the elements and you can get a Telephoto effect, or a Wide-Angle effect. Most often it's a "TELEPHOTO" effect.
I had a couple of old Kodak folder cameras which were no longer functional, due to lack of film, or the bellows being far too holey to be used. So I did what any sane person would do. I remove the lenses for use on my 4x5.
And I can tell you right now, that was the best choice I could have made for these old cameras! The camera is just a light tight box, but if I can't use it, why let the lens, which is a beautiful piece of workmanship, go to waste?
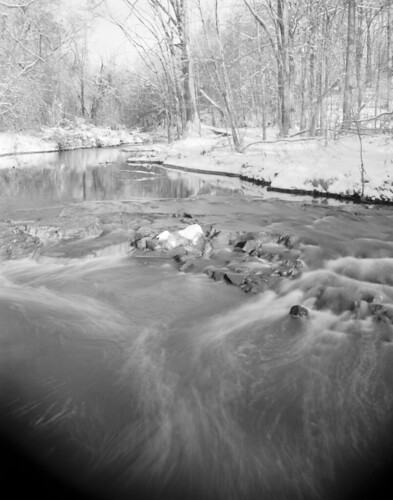
So I did some testing. One of those tests was with some Ilford FP4+ and the lens during the winter.
Visiting one of my old haunts, the Trethewey Wetlands, I took a photo of the serene and glass-like Black Creek river.
What a beautiful site! I knew that as soon as I closed the shutter I had the image that would make me remember about why I shoot 4x5 film. Why large format is so special to me... and why I could never give it up....
Sure enough, this image has made its way onto my wall in the size of 11x14, but it doesn't even begin to do it justice. It needs to be bigger.... 16x20? Probably even bigger... It just had to be bigger! It has so much immense detail, and has such a feeling of serenity and peacfulness....... An image that can probably spend the next many years being reprinted over and over again..
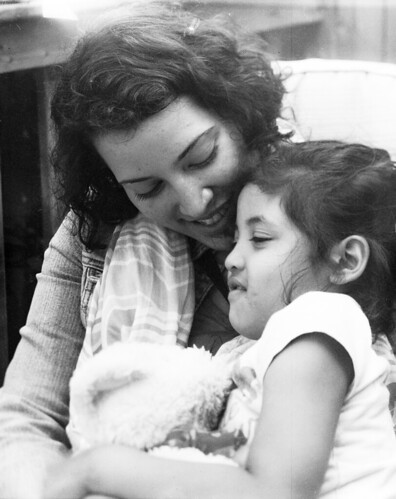
But finally.... What I dare to dream of doing with my big camera... Shoot portraits..
This is what I truly love. Portraits... Large format Portraits have such a different feeling. Such a different relationship, and just give you a whole new meaning to slowing down. You want to capture that moment at the right time, the right way.
This is one of them. Sure, it's not the best for that "Candid" moment, but sometime the stars align, and you are able to capture that moment, just by being there, and being ready.
So remember that when you are shooting any format, digital, or film, try to take the idea that you're shooting a much larger scale. Imagine, instead of shooting just a super simple sensor the size of a postage stamp, or a piece of 35mm film, that you are shooting something much larger. The size of a print, where a single shot matters.
Then focus, and pay attention to your surroundings, the light, the position of your subject. How the background portrays with your subject, and ultimately, what the photo means to you. Does it tell a proper story?
Even when you shoot a digital format camera, you can easily just slow down, and relax. Take a breather and visualize the image before you before you even take the photo...
It'll materialize in your head, and when it does, then release the shutter.
You'll be much happier when you do..
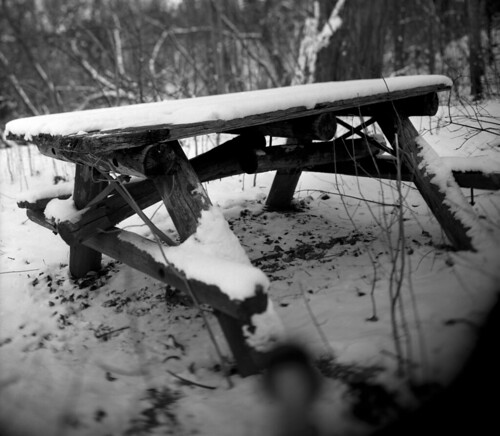
Finally, like many, although this image still eludes me, the shot I have visualized many many many times over. I have taken this photo probably a hundred times in my head, and this time I thought I had it.
I was so close, but again, the shot eluded me.
Sadly, this bench is no longer in this location, but has been moved... Now the image I must visualize again...
And hopefully one day, with the right equipment, I'll get the image I was after...
So why do I shoot Large Format Film?
The simplest answer is this...
Because it lets me imagine a world that perhaps doesn't exist. A simpler world, where time slows down, or even stands still... even if it's just for a moment...
Until next time... Keep those shutters firing!
Also, with +Alex Luyckx and +Mathew Marrash, who have both been asked similar questions, I have wondered this very thing myself.
Why do I shoot Large Format...
It's a complicated question, that is not easily answered. One reason I can think of, is quite simple. It is very relaxing. I enjoy shooting formats like 35mm, and 120.. but there is something that feels too fast about those formats. In a "never stop, never slow-down" world, I like the fact that there's something that cannot be done quickly.
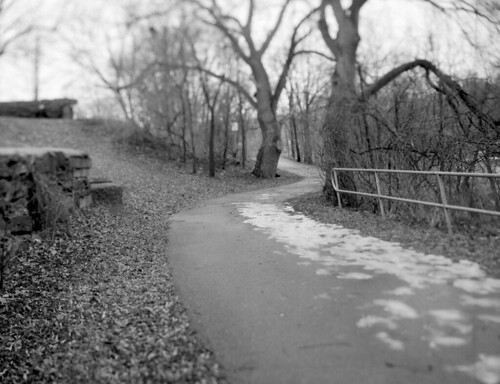 |
| "Winding" - Shanghai GP3 |
When I find myself looking for something far more relaxing and enjoyable than pointing a camera at a subject, and releasing the shutter without much though, I turn to my 4x5. Sure, I wander around with a massive Monorail, but there is something about these amazing cameras. They have immense capability.
The incredible amounts of movement on them, such as swing, tilt, shift, rise or fall, it gives a whole new dimension to the photo.
Take the image above. I'm able to keep the path in focus, while throwing other areas, such as the trees at the top of the image, out of focus, keeping your eyes centered on the path moving through the image.
Plus you can take a single film, and change your entire Metering Index for each shot. A 400 speed film can be 100, or even 800, giving different looks without ever changing your film. Just change your developing.
The incredible amounts of movement on them, such as swing, tilt, shift, rise or fall, it gives a whole new dimension to the photo.
Take the image above. I'm able to keep the path in focus, while throwing other areas, such as the trees at the top of the image, out of focus, keeping your eyes centered on the path moving through the image.
Plus you can take a single film, and change your entire Metering Index for each shot. A 400 speed film can be 100, or even 800, giving different looks without ever changing your film. Just change your developing.
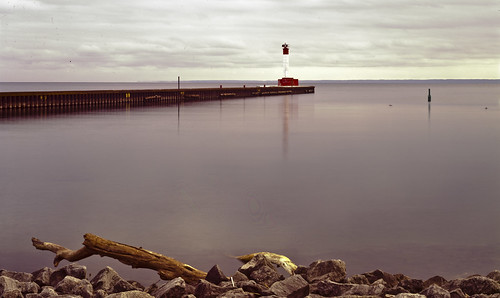 |
| "Oakville Lighthouse" - Fuji Provia 100F |
When you shoot colour, it takes on a whole different dimension. The detail begins to pop right out.
Colour takes on a whole new depth, and the clarity is unobtainable through any other means. Sure, it's only 4x5, but if you take a look at a regular printed photograph that you get from your Local Walmart, from a digital or 35mm print, you'll notice that the print dimensions are 4x6.
Now imagine a negative, or a transparency, that is basically taken on a sheet of film that is just 1" narrower
than the 4x6 print.
To this day, I still remember the very first time I got my hands on my 4x5 Monorail. Browsing the Kijiji website, I just so happened upon someone who was selling a Calumet CC400 with lensboard, case, 5 film holders, a pack of Fuji Provia 100F, and some other various stuff for a very inexpensive price.
All I needed was a lens, and I was ready to go!
So I popped onto that great auction site and got myself a Schneider-Kreuznach Symmar-S 210mm ƒ/5.6 Linhof lens for a price that I have never found again.
After I got the lens I designed, and made, my own lensboard. Painting the front Red, it really made it stand out. The lensboard takes in the "Calumet" red dot logo and blends it seamlessly with the surrounding Bluish-Gray finish of the rest of the camera.
It really looks quite sharp! Those that have seen the lensboard always remark at how lovely it looks.
The next lens I picked up was an old Kodak Ektar 127mm ƒ/4.7 Wide-Angle lens, commonly found on a Speed Graphic, such as what +Alex Luyckx has. It has such a wide image circle, that I think it'll even cover 5x7 film! It gives me movements on 4x5, and like many Kodak lenses, is incredibly sharp.
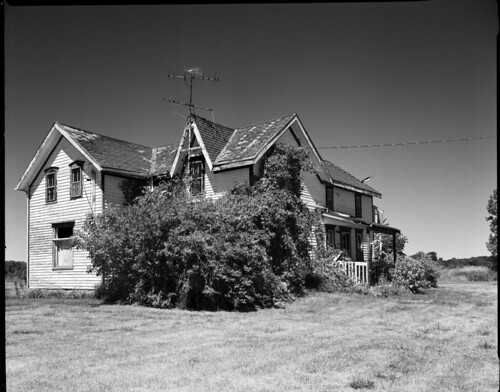 |
| "Rundown" - EFKE IR820C w/Red Filter (Kodak Ektar 127mm) |
Lets look at it a different way. Why not shoot large format? Well, simple. The gear is heavy, cumbersome, expensive, and not easy to transport.
There are film holders, different lenses and boards, big heavy tripods, and enough movements to make your head spin.
But at the same time, when you are shooting a 35mm camera, or even that dSLR, you have a very limited perspective to think of. Where, I find, Large Format lets you take a whole different perspective when shooting.
You can shoot at an angle, and by adjusting your lens angle you can get straight lines and correct perspectives.
Plus, you slow down.
In a world where the digital camera can fire off 30 frames in a few seconds, the large format camera lets you stop, relax, and focus.
 |
| "Spidersilk" - Fuji Provia 100F (Schneider-Kreuznach 210mm) |
Then you have to take a light reading. Well, when I took this, the sun was blasting down through the sky and blowing some parts of the image out. I was shooting a transparency after all, and wanted some of that powerful light to be behind some clouds. So I waited.... and waited... and waited....
After what seemed an eternity (was just short of two hours) I found the sunlight starting to wane.. then finally that harsh glaring light softened down.
Quickly taking a ready, and factoring in the bellows draw, I dialed in the settings on my lens, and the shutter.
Loading the film holder, drawing out the darkslide, then releasing the shutter, I knew I had the image I was after.
It was then that disaster struck. I forgot to label the holder properly, or note it in my book what was loaded.
So I ended up with this film being loaded into the tank along with many other B&W sheets to be processed in HC-110 Dil. H.
Sure enough, however, the image is nothing less than amazing. Super smooth, and incredibly well toned! I couldn't have gotten a better image if I tried.
It almost feels like it just works better in B&W than it ever could in colour.
My wife complains at times when I take the 4x5 our on a walk. "Why are you taking that thing for?? It's so big and heavy, and takes you forever to take a single photo!"
 |
| "IR Garden" - EFKE IR 820C Hoya R72 Filter |
The image in my mind was perfect...
I lined it up in the camera, stopped down the lens, and just envisioned it.
Metering the shot as best as I could, I got the shutter ready and released it....
Tick... tick.... tick... tick.... 45 seconds ticked by....... then finally 90 seconds was reached, which was right on the money for what I metered for, and I closed the shutter....
I knew instantly that i had exactly what I was after...
Sure enough, the image, when I got the film developed, popped out and stared at me. The negative was just beautiful!
My very first IR image had been captured.. Unlike many others who shot their first IR on 35mm or even 120.. I did it on 4x5! And I was absolutely in love with IR! So much so that I bought a roll of Efke IR 820C in 35mm... It makes you slow down as well, shooting IR.
Then there is the old lenses that you find on old Kodak Folders, or the old Rapid Rectilinear lenses, or even Achromatic lenses.
These are dual element lenses that are either cemented together (Achromatic) or separated by a pocket of air (Rectilinear). The difference is that the Rectilinear lenses are actually convertible. Remove one of the elements and you can get a Telephoto effect, or a Wide-Angle effect. Most often it's a "TELEPHOTO" effect.
 |
| "Running" - Ilford FP4+ (Kodak Rapid Rectilinear) |
And I can tell you right now, that was the best choice I could have made for these old cameras! The camera is just a light tight box, but if I can't use it, why let the lens, which is a beautiful piece of workmanship, go to waste?
So I did some testing. One of those tests was with some Ilford FP4+ and the lens during the winter.
Visiting one of my old haunts, the Trethewey Wetlands, I took a photo of the serene and glass-like Black Creek river.
What a beautiful site! I knew that as soon as I closed the shutter I had the image that would make me remember about why I shoot 4x5 film. Why large format is so special to me... and why I could never give it up....
Sure enough, this image has made its way onto my wall in the size of 11x14, but it doesn't even begin to do it justice. It needs to be bigger.... 16x20? Probably even bigger... It just had to be bigger! It has so much immense detail, and has such a feeling of serenity and peacfulness....... An image that can probably spend the next many years being reprinted over and over again..
But finally.... What I dare to dream of doing with my big camera... Shoot portraits..
 |
| "Mother and Daughter" Fomapan 400 (Schneider-Kreuznach 210mm) |
This is one of them. Sure, it's not the best for that "Candid" moment, but sometime the stars align, and you are able to capture that moment, just by being there, and being ready.
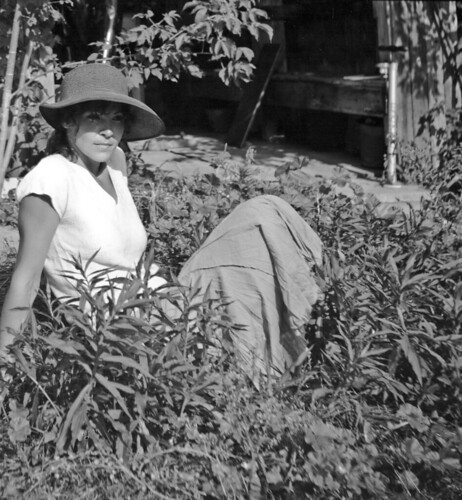 |
| "In The Field" - EFKE IR820C (Baush & Lomb Rapid Rectilinear) No Filter |
Then focus, and pay attention to your surroundings, the light, the position of your subject. How the background portrays with your subject, and ultimately, what the photo means to you. Does it tell a proper story?
Even when you shoot a digital format camera, you can easily just slow down, and relax. Take a breather and visualize the image before you before you even take the photo...
It'll materialize in your head, and when it does, then release the shutter.
You'll be much happier when you do..
 |
| "Ghostly Sitting" - Shanghai GP3 (Carl Zeiss Jena 105mm) |
I was so close, but again, the shot eluded me.
Sadly, this bench is no longer in this location, but has been moved... Now the image I must visualize again...
And hopefully one day, with the right equipment, I'll get the image I was after...
So why do I shoot Large Format Film?
The simplest answer is this...
Because it lets me imagine a world that perhaps doesn't exist. A simpler world, where time slows down, or even stands still... even if it's just for a moment...
Until next time... Keep those shutters firing!
Friday, February 28, 2014
Roll Developing
I have learned a technique for developing sheet film from a friend, and fellow photographer, +Holger Drallmeyer. Now, he doesn't take full credit for it, as his method is using 300mL of chem, and usually uses it for C-41 developing. I have refined it to using only 100mL of chemical.
I have been asked many times, how do I do my developing?
Well I have been promising my blog post for it for a while, but haven't yet done it. Until now!
So, for starters, I use a 5-roll Nikkor Stainless steel tank with a Kindermann plastic lid. They seem to work very well together, nice and tight!
This is very important to prevent leakage.
 This is the tank and lid I use. Behind I have the 650mL cylinder that is filled up to the 300mL mark. This will be used for 3 sheets of film, 100mL at a time. I decant it into another cylinder to 100mL. This is specifically done to make sure I have the suggested 6mL of developer, as I use Rodinal for 4x5 sheet film. Of course, I don't always do this. Sometimes I mix it 100mL at a time with 2mL of developer, as I use a 1+50 ratio.
The green bucket is my dump bucket. I pour all used chemicals into that afterward, other than Fixer, which I use a 1200mL cylinder. Normally I also have a drip tray when I am doing inversion developing, or using my Combi-Plan sheet film developing tank, at least if I am developing 6 sheets at a time, which is very rare. I specifically use that these days for STAND developing, as my Roll Developing technique seems to suit me very well.
Lastly, this is also done at the edge of the table, and for easy clean up sakes, try to put some newspaper or a old towel on the floor under the lip of the table, as chemical can always potentially drip out of the tank.
 So first thing is first. The film. We need to get that sheet of film out of the holder. So, get your holder and have the tank ready. As you can see this is in the light. When you do it you have to do it in complete darkness, or under a 7w DARK GREEN safelight (unless you are using super panchromatic/IR film which requires complete darkness), which might as well be near on pitch black. This information has been shared to me by another friend +Kelly-Shane Fuller who is a very gifted technician with cameras, chemistry, and apparently even cars/motorcycle engines.
That doesn't say anything about his photography, though, which is phenomenal! A very very good photographer. Easily rivals my work, if he would stop shooting Selfies I think he has a lot of potential (sorry an inside joke between the two of us).
But in all honesty, he really is an exceptional photographer, as is +Holger Drallmeyer. If you get a chance, check out their work!
 So opening up the holder we have now got the film ready to be removed from the holder. Now before you say, "Good gawd man, you just ruined a perfectly good sheet of film!" you would be wrong.
This sheet of film is Chinese Shanghai GP3 film which is suffering from their complete near on lack of Quality Control There is a good half cm (1/4 inch) missing of emulsion off the acetate, and 1cm (1/2 inch) of anti-halation missing. Plus there are machine marks and pinholes in the emulsion.
So it is used now for experiments, and stuff like this.
From there we need to load that film into the tank. You need to cup the film slightly to fit it into the tank, making sure that the emulsion is facing toward the middle of the tank.
 The reason you want the emulsion side toward the middle is so that the chemical washes across the emulsion first and foremost, for if it is facing toward the edge of the tank, it might stick to the edge, get damaged, or not develop.
Don't worry, the anti-halation layer WILL wash off.
The other question I have been asked is, "How do I know that 100mL is enough chemical to coat the film, and how did I come to that conclusion?"
Simple. I developed a BLACK sheet of GP3 in 100mL of chemical and it developed evenly. I have developed many more sheets of film using 100mL (and the last one with 75mL) of chemical perfectly! I have been tempted to try 50mL, but am worried it won't work. Have to try it with a 'scrap' sheet sometime.
I guess in answer to the question is just that. It was a guess, and it worked! I started at 300mL but thought that 300mL is a little much for one sheet. So I reduced it to 200mL without a problem, then finally got to 100mL and am really happy with that!
10 sheets would be 1L of chemical solution, which is awesome, considering my CombiPlan uses 1050mL of chemical and will only do 6 sheets, and the FR Tank will do many more (I think either 10 or 12 sheets) but uses 1500mL!!
 So now we have the film in the can, the lid is on, the lights are on, and we're just about ready to get started. Right, so now what?
Easy, we get the chemical ready. I usually have at least 2L of water at around 18°C ready to go for mixing and using for stop bath. Of course, I also usually develop a good 4 to 6 sheets in one session. First sheet is developed, then it goes into the sink to be washed. While washing, I'll develop the next sheet. When it is done developing, I take the sheet from the wash, and put it into the Wetting Agent bath, and develop the next sheet. Then it's like a procession. Develop, wash, wetting agent, hang to dry.
And when I am done the last sheet, I set a timer for 15:00 and let it wash for that amount of time.
I almost always leave the film in the wetting agent for 5:00 unless I am developing, then it can be for about 15:00 or more, depending on how long it takes to develop each sheet of film.


 And now that we've finished developing it, we can pour out the fixer and peek at the negative. And here it is!
Perfectly developed negative!
So as you can see, this method works very well, and can be used for C-41, E6, and B&W developing.
When you start using this method for developing film, you'll start to tray develop less and less.
Or maybe you never have tray developed your film, or you haven't shot sheet film before and were intimidated by tray developing, this is an excellent alternative to tray developing.
For one, you can do it in the light instead of complete darkness. This method is easily controlled, and has less of a chance of scratching your film, pretty much almost a "NIL" chance of it. Plus, no elastic band marks from the "TACO" method.
I have been asked many times, how do I do my developing?
Well I have been promising my blog post for it for a while, but haven't yet done it. Until now!
So, for starters, I use a 5-roll Nikkor Stainless steel tank with a Kindermann plastic lid. They seem to work very well together, nice and tight!
This is very important to prevent leakage.
This is the tank and lid I use. Behind I have the 650mL cylinder that is filled up to the 300mL mark. This will be used for 3 sheets of film, 100mL at a time. I decant it into another cylinder to 100mL. This is specifically done to make sure I have the suggested 6mL of developer, as I use Rodinal for 4x5 sheet film. Of course, I don't always do this. Sometimes I mix it 100mL at a time with 2mL of developer, as I use a 1+50 ratio.The green bucket is my dump bucket. I pour all used chemicals into that afterward, other than Fixer, which I use a 1200mL cylinder. Normally I also have a drip tray when I am doing inversion developing, or using my Combi-Plan sheet film developing tank, at least if I am developing 6 sheets at a time, which is very rare. I specifically use that these days for STAND developing, as my Roll Developing technique seems to suit me very well.
Lastly, this is also done at the edge of the table, and for easy clean up sakes, try to put some newspaper or a old towel on the floor under the lip of the table, as chemical can always potentially drip out of the tank.
So first thing is first. The film. We need to get that sheet of film out of the holder. So, get your holder and have the tank ready. As you can see this is in the light. When you do it you have to do it in complete darkness, or under a 7w DARK GREEN safelight (unless you are using super panchromatic/IR film which requires complete darkness), which might as well be near on pitch black. This information has been shared to me by another friend +Kelly-Shane Fuller who is a very gifted technician with cameras, chemistry, and apparently even cars/motorcycle engines.That doesn't say anything about his photography, though, which is phenomenal! A very very good photographer. Easily rivals my work, if he would stop shooting Selfies I think he has a lot of potential (sorry an inside joke between the two of us).
But in all honesty, he really is an exceptional photographer, as is +Holger Drallmeyer. If you get a chance, check out their work!
This sheet of film is Chinese Shanghai GP3 film which is suffering from their complete near on lack of Quality Control There is a good half cm (1/4 inch) missing of emulsion off the acetate, and 1cm (1/2 inch) of anti-halation missing. Plus there are machine marks and pinholes in the emulsion.
So it is used now for experiments, and stuff like this.
From there we need to load that film into the tank. You need to cup the film slightly to fit it into the tank, making sure that the emulsion is facing toward the middle of the tank.
Don't worry, the anti-halation layer WILL wash off.
The other question I have been asked is, "How do I know that 100mL is enough chemical to coat the film, and how did I come to that conclusion?"
Simple. I developed a BLACK sheet of GP3 in 100mL of chemical and it developed evenly. I have developed many more sheets of film using 100mL (and the last one with 75mL) of chemical perfectly! I have been tempted to try 50mL, but am worried it won't work. Have to try it with a 'scrap' sheet sometime.
I guess in answer to the question is just that. It was a guess, and it worked! I started at 300mL but thought that 300mL is a little much for one sheet. So I reduced it to 200mL without a problem, then finally got to 100mL and am really happy with that!
10 sheets would be 1L of chemical solution, which is awesome, considering my CombiPlan uses 1050mL of chemical and will only do 6 sheets, and the FR Tank will do many more (I think either 10 or 12 sheets) but uses 1500mL!!
Easy, we get the chemical ready. I usually have at least 2L of water at around 18°C ready to go for mixing and using for stop bath. Of course, I also usually develop a good 4 to 6 sheets in one session. First sheet is developed, then it goes into the sink to be washed. While washing, I'll develop the next sheet. When it is done developing, I take the sheet from the wash, and put it into the Wetting Agent bath, and develop the next sheet. Then it's like a procession. Develop, wash, wetting agent, hang to dry.
And when I am done the last sheet, I set a timer for 15:00 and let it wash for that amount of time.
I almost always leave the film in the wetting agent for 5:00 unless I am developing, then it can be for about 15:00 or more, depending on how long it takes to develop each sheet of film.
So now we have the 100mL of chemical ready to go. So lets get started! Pop the filler cap, and pour it into your tank and start your timer.
This is where this method starts to excel over the inversion method. You can actually reduce your developing times by about 10% because it is "constant" agitation! The faster you agitate will control your contrast and grain levels. Faster agitation = more grain more contrast. Slower agitation = lower grain and lower contrast.
Of course using a different developer, like HC-110 or TMAX Developer will change those as well.
I just really like Rodinal with 4x5 because of the high acutance and incredibly smooth tones.
+Alex Luyckx will contest to that and say, "No way, Pyrocat PMK All the way!"
This is where this method starts to excel over the inversion method. You can actually reduce your developing times by about 10% because it is "constant" agitation! The faster you agitate will control your contrast and grain levels. Faster agitation = more grain more contrast. Slower agitation = lower grain and lower contrast.
Of course using a different developer, like HC-110 or TMAX Developer will change those as well.
I just really like Rodinal with 4x5 because of the high acutance and incredibly smooth tones.
+Alex Luyckx will contest to that and say, "No way, Pyrocat PMK All the way!"
Keeping the tank on the edge of the table, so it is flat, you roll it back and forth. You can go fast for higher contrast, but you will increase your grain, or slowly to keep grain down and a smoother contrast.
On the right image you will see a line that I have drawn on the can. This line says, "ROLL PAST" which is so I know I have given the can a full rotation left to right/right to left.
When the time is up you dump the developer, and pour in your stop bath. Continue to roll it back and forth for at least 1 minute. When that is complete, dump that bath and pour in the fixer.
I fix for about 5 minutes continuously agitating the film the same way.
On the right image you will see a line that I have drawn on the can. This line says, "ROLL PAST" which is so I know I have given the can a full rotation left to right/right to left.
When the time is up you dump the developer, and pour in your stop bath. Continue to roll it back and forth for at least 1 minute. When that is complete, dump that bath and pour in the fixer.
I fix for about 5 minutes continuously agitating the film the same way.
And now that we've finished developing it, we can pour out the fixer and peek at the negative. And here it is!Perfectly developed negative!
So as you can see, this method works very well, and can be used for C-41, E6, and B&W developing.
When you start using this method for developing film, you'll start to tray develop less and less.
Or maybe you never have tray developed your film, or you haven't shot sheet film before and were intimidated by tray developing, this is an excellent alternative to tray developing.
For one, you can do it in the light instead of complete darkness. This method is easily controlled, and has less of a chance of scratching your film, pretty much almost a "NIL" chance of it. Plus, no elastic band marks from the "TACO" method.
This is an excellent method for developing your 4x5 sheet film, and even 5x7 sheet film, as 100mL will even cover 5x7 sheet film.
Hope this was informative and gave you some insight into another, and possibly easier, method to develop sheet film!
Until next time, keep those shutters firing!
Until next time, keep those shutters firing!
Thursday, February 27, 2014
Returning To Kodak
This year I have decided to shoot a lot more 4x5 film. That means much less shooting, and more concentration on making sure that the shot counts!
Using my Calumet CC400 Monorail is not the easiest camera to use in the field.
Alright, lets face it, it is downright near on impossible, but I do it! I get it into the field all the time that I can and use it. Whether it is a wide-angle, standard, or a telephoto lens, I just find it most relaxing.
I have entirely dedicated this year to three film stocks. FP4+, HP5+ and Fomapan 400. I love all three films, but have a preference to HP5+ just because it is such a gorgeous film! That said, however, I cannot deny the classic emulsion of Fomapan 400, and the wonderful contrast of FP4+.
I returned to the Kodak Plant here in Toronto, well at least what is left of it. I spent a fair amount of time here in the past, and plan on revisiting it again, this time with more film, and possibly some EKTAR 100 and Provia 100 for some of the desolation and using my ultra-wide angle lenses. Although those Ultra-wides aren't QUITE up to 4x5 snuff, but really damn close enough to work. Those lenses would be the ones I pulled off a pair of Kodak Brownie folders, and one off a Agfa Billy Record. Some 105mm lenses off the Billy Record, which normally covers 6x9 beautifully, but actually gives some really lovely coverage on 4x5 film as well.
I wandered into the plant and had one shot in mind. The front foyer and stairs. Once a grand entrance, with beautiful brasswork and wood rails and marble stairs, they now lay in complete ruin and are no longer the joy they must have once been to look at.
I visited this place recently with my Kodak Signet 35 and Kodak Gold film during my previous 52-rolls and made it the finale to the Month of Kodak in March of 2013. This time however, I will be entirely dedicating my time to 4x5 film. As such, a month of Kodak would entail using ONLY Kodak Film with a Kodak lens. Since I have not committed to Kodak film this year, that will have to pass.
I wish I had +Mathew Marrash's Kodak Commercial D 8x10 camera with one of his gorgeous Field Ektar lenses, but alas, I do not.
My wife, +Donna Bitaxi, worked for Kodak many years ago at this very facility. But when they decided to consolidate their chemicals into a third party company, and began the shift away from traditional B&W photo papers, their plant closed. My wife, offered a position and moving expenses to travel to a different location in British Columbia, declined the offer, and stayed in Toronto, where she eventually met me.
She worked in the Black and White Photopaper packaging department, and like many of us, spent plenty of time under a red Safe-Light.
Sadly, in 2005, this plant closed its doors for good. In late 2006 the demolition companies were called in and within a couple of short years the plant, save for Kodak Building #9, was erased from the map forever.
Who owns this land and the last building upon it, I do not know, but it is a place for firebugs, graffiti artists, vagrants, and Urban Explorers. I took a few Digital Images where I was there this time, as I had my Rebel XS and 50mm lens, and figured it would be the best choice to capture some quick shots.
Today, this is what the stairwell looks like. Crumbling, broken, and ruined. A sad testament to what it once was, and possibly what lies ahead for the Film Giant in the future.
Until next time fellow bloggers... Keep this shutters firing!
Using my Calumet CC400 Monorail is not the easiest camera to use in the field.
Alright, lets face it, it is downright near on impossible, but I do it! I get it into the field all the time that I can and use it. Whether it is a wide-angle, standard, or a telephoto lens, I just find it most relaxing.
I have entirely dedicated this year to three film stocks. FP4+, HP5+ and Fomapan 400. I love all three films, but have a preference to HP5+ just because it is such a gorgeous film! That said, however, I cannot deny the classic emulsion of Fomapan 400, and the wonderful contrast of FP4+.
I returned to the Kodak Plant here in Toronto, well at least what is left of it. I spent a fair amount of time here in the past, and plan on revisiting it again, this time with more film, and possibly some EKTAR 100 and Provia 100 for some of the desolation and using my ultra-wide angle lenses. Although those Ultra-wides aren't QUITE up to 4x5 snuff, but really damn close enough to work. Those lenses would be the ones I pulled off a pair of Kodak Brownie folders, and one off a Agfa Billy Record. Some 105mm lenses off the Billy Record, which normally covers 6x9 beautifully, but actually gives some really lovely coverage on 4x5 film as well.
I wandered into the plant and had one shot in mind. The front foyer and stairs. Once a grand entrance, with beautiful brasswork and wood rails and marble stairs, they now lay in complete ruin and are no longer the joy they must have once been to look at.
I visited this place recently with my Kodak Signet 35 and Kodak Gold film during my previous 52-rolls and made it the finale to the Month of Kodak in March of 2013. This time however, I will be entirely dedicating my time to 4x5 film. As such, a month of Kodak would entail using ONLY Kodak Film with a Kodak lens. Since I have not committed to Kodak film this year, that will have to pass.
I wish I had +Mathew Marrash's Kodak Commercial D 8x10 camera with one of his gorgeous Field Ektar lenses, but alas, I do not.
My wife, +Donna Bitaxi, worked for Kodak many years ago at this very facility. But when they decided to consolidate their chemicals into a third party company, and began the shift away from traditional B&W photo papers, their plant closed. My wife, offered a position and moving expenses to travel to a different location in British Columbia, declined the offer, and stayed in Toronto, where she eventually met me.
She worked in the Black and White Photopaper packaging department, and like many of us, spent plenty of time under a red Safe-Light.
Sadly, in 2005, this plant closed its doors for good. In late 2006 the demolition companies were called in and within a couple of short years the plant, save for Kodak Building #9, was erased from the map forever.
Who owns this land and the last building upon it, I do not know, but it is a place for firebugs, graffiti artists, vagrants, and Urban Explorers. I took a few Digital Images where I was there this time, as I had my Rebel XS and 50mm lens, and figured it would be the best choice to capture some quick shots.
 |
| Image taken on a Calumet CC400 4x5 Monorail, Kodak Ektar 127mm ƒ/4.7, Ilford FP4+ 125 @ 125ASA under natural light. Exposure 8s at ƒ/8. Metered for a 4s exposure and added 4s for Reciprocity. |
Until next time fellow bloggers... Keep this shutters firing!
Subscribe to:
Posts (Atom)