 |
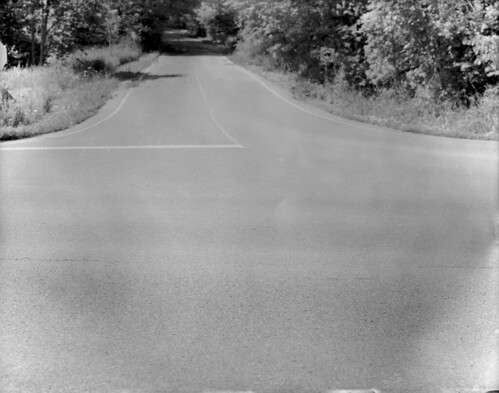
| Calumet CC400 4x5 Monorail - Schneider-Symmar 180mm ƒ/5.6 @ ƒ/16 - 11:48PM August 1, 2017 1s Exposure - Rollei RPX25 - HC-110 Dil. B 5:00 20°C |
Showing posts with label Blia101. Show all posts
Showing posts with label Blia101. Show all posts
Saturday, August 5, 2017
Empty Road
I took this photo as I have passed this spot several times, almost every single day to be exact, have wanted to shoot it very similar to how I did, however the issue has always been a matter of 'how to shoot it' and 'how to frame it'. I decided on having the road into the forest to be out of focus and the T junction to be in focus. I find that the back elements being in focus and the front elements, such as the road, if it was out it wouldn't have the same effect. At least in my mind, plus I didn't like how it looked when I had tested that in camera. It would have been a huge challenge to shoot this in 35mm the same way as I'm sure the focusing would have been a real trick and I doubt I would have got the same effect out of focus as I would here. Especially at around ƒ/16 or so, as I was here. Maybe the image isn't quite what I had in mind, but it's pretty close. I'll have to try this again when the fogs return.

Friday, August 4, 2017
Mamiya M645 1000s First Look
I took my wife's Mamiya 645 1000s out for a first look. I haven't used a Mamiya before this and I tell you one thing, I am very happy I got the chance to take it out. Wish I hadn't shot the second half roll of +Donna Bitaxi, but I am sure she'll understand.
The low down is that this is a very light modular camera with a lot of options and a lot of promise. A camera I would highly recommend you give a second look at, but be forewarned, there is only one film back, which is non-removeable. So if you want to be able to change film-backs mid-roll, you might want to look elsewhere. |
| Mamiya M645 1000s - Mamiya Sekor 80mm ƒ/2.8 - Ilford HP5+ - TMAX Developer 1+4 |
 |
| Mamiya M645 1000s - Mamiya Sekor 80mm ƒ/2.8 - Ilford HP5+ - TMAX Developer 1+4 |
 |
| Mamiya M645 1000s - Mamiya Sekor 80mm ƒ/2.8 - Ilford HP5+ - TMAX Developer 1+4 |
Thursday, August 3, 2017
Expired Tri-X Farm
It never ceases to amaze me at how well Expired Film can still look, even almost 50 years later. Here is a shot using Expired Kodak Tri-X from the early 70s (expired 1971) yet it still looks fantastic. Sure there are some anomalies with the film, but nothing I am worried about considering the age.
I tell you one thing, it was definitely nice to get out there shooting my 4x5 again!
 |
| Calumet CC400 - Schneider Kreuznach Symmar 180mm ƒ/5.6 @ ƒ/22 w/#25a Red Filter - ½s Exposure Kodak TriX Expired 1971 |
Wednesday, April 5, 2017
Looking Up
So last weekend I tried something a little different for a change. Instead of just looking at what is around me and in front of me, while in Downtown Toronto, I decided to try... looking up... for a different perspective on things..
The results I got were actually quite inspiring. I think I like this idea of upward perspective photography.. It makes you really take a different approach to how you view things..
I'm really impressed with how everything turned out. I think I'll do a bit more of this whole.. shooting up thing. heh..
Anyway.. Until next time, keep those shutters firing!
The results I got were actually quite inspiring. I think I like this idea of upward perspective photography.. It makes you really take a different approach to how you view things..
 |
Canon T90 - Canon 35-105mm ƒ/3.5 - Kodak Tri-X 400 - SPUR-HRX 1+17 |
 |
| Canon T90 - Osawa 24mm ƒ/2.8 - Kodak Tri-X - SPUR-HRX 1+17 |
 |
| Canon T90 - Osawa 24mm ƒ/2.8 - Kodak Tri-X - SPUR-HRX 1+17 |
 |
| Canon T90 - Osawa 24mm ƒ/2.8 - Kodak Tri-X - SPUR-HRX 1+17 |
 |
| Canon T90 - Osawa 24mm ƒ/2.8 - Kodak Tri-X - SPUR-HRX 1+17 |
 |
| Canon T90 - Canon 35-105mm ƒ/3.5 - Kodak Tri-X - HC-110 Dil. B |
 |
| Canon T90 - Canon 35-105mm ƒ/3.5 - Kodak Tri-X - HC-110 Dil. B |
Anyway.. Until next time, keep those shutters firing!
Monday, March 2, 2015
Continuing The Tradition...
Today was a little different for me. I was on my way home and I drove passed a local camera and film supply chain, known as Henrys. (www.henrys.com).
I'm always a weakling when it comes to film and camera stores. Well I decided to pop in and see what they had, and sure enough there was some Ilford MGIV 16x20 paper. I thought I grabbed the Fibre based, but instead I grabbed RC. Ah well, that's okay, I'll be able to work with it that way no problem, especially since I have a couple of photos I am dying to turn into 16x20 prints!
Now to find some 16x20 trays... Yes I bought paper I cannot develop yet, shaddup! It's a smart idea, because now I have no excuse but to find some!
maybe I'll pop into a hardware store and improvise somehow...
ABS tubing perhaps??
Anyway, onto the main part of this post. Although I am not shooting quite as much film this year as others, I am making up for it by getting caught up on printing. I do not believe for a moment that a photo should live as a negative or a scan, or even on a computer, but should be finalized as a print. If you want to feel something for that photo you love, make a print...
Well, my eldest (almost 7) he saw the big pack of paper and thought it was neat... Since he's learning to read and wanted to know what it was I had him sound it all out.
"ILFORD PHOTOGRAPHIC PAPER"...
Took about 5 minutes of work and sounding it out syllable by syllable, but he felt very very proud of himself to be able to do it.
Sure enough they wanted to know what I do with this paper, so I told them. BUT that wasn't enough.. Looking at the time I realized, yeah I have enough time before dinner... So I said, "alright, come with me, but it'll be really dark down there!"
Didn't phase them at all, especially the youngest who has no problem with the dark. Eldest, well, he's a little scared of the dark.
Well they came down with their little flashlights to light the way, and waltzed over to my darkroom. Sitting down on the milk-crates I gave them a dry walkthrough of how it works.
I showed them picking the negative and loading it into the holder, to how it looks projected down onto the paper.
They even looked through my grain focuser to see the image and how it is focused.
After a dry run with the lights off, they asked if they could see me make a print.
I took my youngest's flashlight (he doesn't quite understand) and let him pull the chain to turn off the light.
Flipping the switch on my Besseler 45MXT to turn on the safelight so they could see (and myself included) I filled the trays with the Developer (which is close to a year old, has been mixed with some Ilfosol-3 and D76, don't ask, and looks like really bad Guiness), Stop and Fix (fix at least is very fresh as I just mixed it less than 24 hours previous).
After that was done I told them to both stand up and see the image as I "stop down" the lens. They thought that was neat, but thought it was even cooler to see the iris of the lens I was holding up (Schneider-Componen 80mm ƒ/5.6 for 645 and 6x6 negatives) to show them why the light was dimming as the iris closed.
After that was set (ƒ/8 on the lens) I set the timer on the enlarger (using my Bogens 69 Special for 35mm) to 30s. I rarely do test strips, as I seem to be able to just look at the light and know the time required to make the print.. Don't ask, but so far I've never been wrong with RC paper (track record isn't quite as good with Fibre).
Under the safelight I showed them the 8x10 paper I was going to use (Ilford MGIV Satin RC) and how it has two sides. The matte rough side, which is the back, and the smooth shiny side that is for printing. They got to feel it and thought it was really cool!
Loading it into my Easel I turned off the safelight and said, okay now we do the print!
I flipped the switch on the timer and told my littlest to stand beside his big brother (who was still sitting) so he could see what was happening.
As the timer silently clicked down to 0 I told them that the next part will be like magic.
The room went black again.... I flipped on the safelight and pulled the paper out of the easel and told them to stand up and stand over beside the developing tray.
Here comes the magic....
I put the paper into the developer and started rocking the tray gently... back.... and forth..
10 seconds... back and forth...
20 seconds... back and forth...
Then the magic happened.... The image started to come to light and the kids expression... "wow! I see it, daddy... I see it!"
I'm always a weakling when it comes to film and camera stores. Well I decided to pop in and see what they had, and sure enough there was some Ilford MGIV 16x20 paper. I thought I grabbed the Fibre based, but instead I grabbed RC. Ah well, that's okay, I'll be able to work with it that way no problem, especially since I have a couple of photos I am dying to turn into 16x20 prints!
Now to find some 16x20 trays... Yes I bought paper I cannot develop yet, shaddup! It's a smart idea, because now I have no excuse but to find some!
maybe I'll pop into a hardware store and improvise somehow...
ABS tubing perhaps??
Anyway, onto the main part of this post. Although I am not shooting quite as much film this year as others, I am making up for it by getting caught up on printing. I do not believe for a moment that a photo should live as a negative or a scan, or even on a computer, but should be finalized as a print. If you want to feel something for that photo you love, make a print...
Well, my eldest (almost 7) he saw the big pack of paper and thought it was neat... Since he's learning to read and wanted to know what it was I had him sound it all out.
"ILFORD PHOTOGRAPHIC PAPER"...
Took about 5 minutes of work and sounding it out syllable by syllable, but he felt very very proud of himself to be able to do it.
Sure enough they wanted to know what I do with this paper, so I told them. BUT that wasn't enough.. Looking at the time I realized, yeah I have enough time before dinner... So I said, "alright, come with me, but it'll be really dark down there!"
Didn't phase them at all, especially the youngest who has no problem with the dark. Eldest, well, he's a little scared of the dark.
Well they came down with their little flashlights to light the way, and waltzed over to my darkroom. Sitting down on the milk-crates I gave them a dry walkthrough of how it works.
I showed them picking the negative and loading it into the holder, to how it looks projected down onto the paper.
They even looked through my grain focuser to see the image and how it is focused.
After a dry run with the lights off, they asked if they could see me make a print.
I took my youngest's flashlight (he doesn't quite understand) and let him pull the chain to turn off the light.
Flipping the switch on my Besseler 45MXT to turn on the safelight so they could see (and myself included) I filled the trays with the Developer (which is close to a year old, has been mixed with some Ilfosol-3 and D76, don't ask, and looks like really bad Guiness), Stop and Fix (fix at least is very fresh as I just mixed it less than 24 hours previous).
After that was done I told them to both stand up and see the image as I "stop down" the lens. They thought that was neat, but thought it was even cooler to see the iris of the lens I was holding up (Schneider-Componen 80mm ƒ/5.6 for 645 and 6x6 negatives) to show them why the light was dimming as the iris closed.
After that was set (ƒ/8 on the lens) I set the timer on the enlarger (using my Bogens 69 Special for 35mm) to 30s. I rarely do test strips, as I seem to be able to just look at the light and know the time required to make the print.. Don't ask, but so far I've never been wrong with RC paper (track record isn't quite as good with Fibre).
Under the safelight I showed them the 8x10 paper I was going to use (Ilford MGIV Satin RC) and how it has two sides. The matte rough side, which is the back, and the smooth shiny side that is for printing. They got to feel it and thought it was really cool!
Loading it into my Easel I turned off the safelight and said, okay now we do the print!
I flipped the switch on the timer and told my littlest to stand beside his big brother (who was still sitting) so he could see what was happening.
As the timer silently clicked down to 0 I told them that the next part will be like magic.
The room went black again.... I flipped on the safelight and pulled the paper out of the easel and told them to stand up and stand over beside the developing tray.
Here comes the magic....
I put the paper into the developer and started rocking the tray gently... back.... and forth..
10 seconds... back and forth...
20 seconds... back and forth...
Then the magic happened.... The image started to come to light and the kids expression... "wow! I see it, daddy... I see it!"
30 seconds...
And for almost 2 minutes in the developer the image was finally done...
Into the stop for 10 seconds and finally the fix for 5 minutes...
The lights came on and the kids were amazed at the magic of the print.. After explaining to them how it all works and explaining to my eldest how two negatives create the positive image and why you get a negative when you shoot film (not that I really expect him to remember it) I dumped the chemicals back into their respective bottles and up to the bathroom to wash the print...
So I showed my kids the process that is more than a century and a half old, and still holds the magic for me today as it did the first time I ever saw a print appear in the developing tray....
And for almost 2 minutes in the developer the image was finally done...
Into the stop for 10 seconds and finally the fix for 5 minutes...
The lights came on and the kids were amazed at the magic of the print.. After explaining to them how it all works and explaining to my eldest how two negatives create the positive image and why you get a negative when you shoot film (not that I really expect him to remember it) I dumped the chemicals back into their respective bottles and up to the bathroom to wash the print...
So I showed my kids the process that is more than a century and a half old, and still holds the magic for me today as it did the first time I ever saw a print appear in the developing tray....
 This print will be a little special for me, as it is the first print I made with my two boys...
Made on Ilford MGIV RC Satin from a negative originally taken on Svema Blue Sensitive film shot on a Canon T90 with a Osawa 24mm ƒ/2.8 lens. Film developed in Ilfosol-3 1+14 for 6 minutes...
Until next time, keep those shutters firing!
Thursday, May 29, 2014
Why I Shoot Large Format...
So there is a question put out there by some friends of mine.
Also, with +Alex Luyckx and +Mathew Marrash, who have both been asked similar questions, I have wondered this very thing myself.
Why do I shoot Large Format...
It's a complicated question, that is not easily answered. One reason I can think of, is quite simple. It is very relaxing. I enjoy shooting formats like 35mm, and 120.. but there is something that feels too fast about those formats. In a "never stop, never slow-down" world, I like the fact that there's something that cannot be done quickly.
When you shoot colour, it takes on a whole different dimension. The detail begins to pop right out.
Colour takes on a whole new depth, and the clarity is unobtainable through any other means. Sure, it's only 4x5, but if you take a look at a regular printed photograph that you get from your Local Walmart, from a digital or 35mm print, you'll notice that the print dimensions are 4x6.
Now imagine a negative, or a transparency, that is basically taken on a sheet of film that is just 1" narrower
than the 4x6 print.
To this day, I still remember the very first time I got my hands on my 4x5 Monorail. Browsing the Kijiji website, I just so happened upon someone who was selling a Calumet CC400 with lensboard, case, 5 film holders, a pack of Fuji Provia 100F, and some other various stuff for a very inexpensive price.
All I needed was a lens, and I was ready to go!
So I popped onto that great auction site and got myself a Schneider-Kreuznach Symmar-S 210mm ƒ/5.6 Linhof lens for a price that I have never found again.
After I got the lens I designed, and made, my own lensboard. Painting the front Red, it really made it stand out. The lensboard takes in the "Calumet" red dot logo and blends it seamlessly with the surrounding Bluish-Gray finish of the rest of the camera.
It really looks quite sharp! Those that have seen the lensboard always remark at how lovely it looks.
The next lens I picked up was an old Kodak Ektar 127mm ƒ/4.7 Wide-Angle lens, commonly found on a Speed Graphic, such as what +Alex Luyckx has. It has such a wide image circle, that I think it'll even cover 5x7 film! It gives me movements on 4x5, and like many Kodak lenses, is incredibly sharp.
But that doesn't necessarily answer the question as to why I shoot large format. And as I said, it's not a question easily answered.
Lets look at it a different way. Why not shoot large format? Well, simple. The gear is heavy, cumbersome, expensive, and not easy to transport.
There are film holders, different lenses and boards, big heavy tripods, and enough movements to make your head spin.
But at the same time, when you are shooting a 35mm camera, or even that dSLR, you have a very limited perspective to think of. Where, I find, Large Format lets you take a whole different perspective when shooting.
You can shoot at an angle, and by adjusting your lens angle you can get straight lines and correct perspectives.
Plus, you slow down.
In a world where the digital camera can fire off 30 frames in a few seconds, the large format camera lets you stop, relax, and focus.
This image is probably a prime example of slowing down. From start to finish it took me no less than 2 hours to get it set up. After focusing I had to measure off the bellows and calculate the bellows factor. That means adding stops to represent the amount of light lost from the lens to the film-plane due to the bellows extension. This is done using a tape measure, or a guesstimate, of the lensboard to the film plane. A 210mm lens will have a bellows draw of 210mm from the film plane to the lens at infinity. This is the normal factor for the lens. While you extend it beyond 210mm you have to increase the number of stops of light for your exposure. Thankfully, instead of doing a bunch of math either in my head, or on paper, I have an app for that on my phone (yes there is an App for just about everything!).
Then you have to take a light reading. Well, when I took this, the sun was blasting down through the sky and blowing some parts of the image out. I was shooting a transparency after all, and wanted some of that powerful light to be behind some clouds. So I waited.... and waited... and waited....
After what seemed an eternity (was just short of two hours) I found the sunlight starting to wane.. then finally that harsh glaring light softened down.
Quickly taking a ready, and factoring in the bellows draw, I dialed in the settings on my lens, and the shutter.
Loading the film holder, drawing out the darkslide, then releasing the shutter, I knew I had the image I was after.
It was then that disaster struck. I forgot to label the holder properly, or note it in my book what was loaded.
So I ended up with this film being loaded into the tank along with many other B&W sheets to be processed in HC-110 Dil. H.
Sure enough, however, the image is nothing less than amazing. Super smooth, and incredibly well toned! I couldn't have gotten a better image if I tried.
It almost feels like it just works better in B&W than it ever could in colour.
My wife complains at times when I take the 4x5 our on a walk. "Why are you taking that thing for?? It's so big and heavy, and takes you forever to take a single photo!"
Well, again, you slow down, and you really pay attention to what you are going to take a photo of. When I was at High Park, I imagined this water garden all aglow in IR light.
The image in my mind was perfect...
I lined it up in the camera, stopped down the lens, and just envisioned it.
Metering the shot as best as I could, I got the shutter ready and released it....
Tick... tick.... tick... tick.... 45 seconds ticked by....... then finally 90 seconds was reached, which was right on the money for what I metered for, and I closed the shutter....
I knew instantly that i had exactly what I was after...
Sure enough, the image, when I got the film developed, popped out and stared at me. The negative was just beautiful!
My very first IR image had been captured.. Unlike many others who shot their first IR on 35mm or even 120.. I did it on 4x5! And I was absolutely in love with IR! So much so that I bought a roll of Efke IR 820C in 35mm... It makes you slow down as well, shooting IR.
Then there is the old lenses that you find on old Kodak Folders, or the old Rapid Rectilinear lenses, or even Achromatic lenses.
These are dual element lenses that are either cemented together (Achromatic) or separated by a pocket of air (Rectilinear). The difference is that the Rectilinear lenses are actually convertible. Remove one of the elements and you can get a Telephoto effect, or a Wide-Angle effect. Most often it's a "TELEPHOTO" effect.
I had a couple of old Kodak folder cameras which were no longer functional, due to lack of film, or the bellows being far too holey to be used. So I did what any sane person would do. I remove the lenses for use on my 4x5.
And I can tell you right now, that was the best choice I could have made for these old cameras! The camera is just a light tight box, but if I can't use it, why let the lens, which is a beautiful piece of workmanship, go to waste?
So I did some testing. One of those tests was with some Ilford FP4+ and the lens during the winter.
Visiting one of my old haunts, the Trethewey Wetlands, I took a photo of the serene and glass-like Black Creek river.
What a beautiful site! I knew that as soon as I closed the shutter I had the image that would make me remember about why I shoot 4x5 film. Why large format is so special to me... and why I could never give it up....
Sure enough, this image has made its way onto my wall in the size of 11x14, but it doesn't even begin to do it justice. It needs to be bigger.... 16x20? Probably even bigger... It just had to be bigger! It has so much immense detail, and has such a feeling of serenity and peacfulness....... An image that can probably spend the next many years being reprinted over and over again..
But finally.... What I dare to dream of doing with my big camera... Shoot portraits..
This is what I truly love. Portraits... Large format Portraits have such a different feeling. Such a different relationship, and just give you a whole new meaning to slowing down. You want to capture that moment at the right time, the right way.
This is one of them. Sure, it's not the best for that "Candid" moment, but sometime the stars align, and you are able to capture that moment, just by being there, and being ready.
So remember that when you are shooting any format, digital, or film, try to take the idea that you're shooting a much larger scale. Imagine, instead of shooting just a super simple sensor the size of a postage stamp, or a piece of 35mm film, that you are shooting something much larger. The size of a print, where a single shot matters.
Then focus, and pay attention to your surroundings, the light, the position of your subject. How the background portrays with your subject, and ultimately, what the photo means to you. Does it tell a proper story?
Even when you shoot a digital format camera, you can easily just slow down, and relax. Take a breather and visualize the image before you before you even take the photo...
It'll materialize in your head, and when it does, then release the shutter.
You'll be much happier when you do..
Finally, like many, although this image still eludes me, the shot I have visualized many many many times over. I have taken this photo probably a hundred times in my head, and this time I thought I had it.
I was so close, but again, the shot eluded me.
Sadly, this bench is no longer in this location, but has been moved... Now the image I must visualize again...
And hopefully one day, with the right equipment, I'll get the image I was after...
So why do I shoot Large Format Film?
The simplest answer is this...
Because it lets me imagine a world that perhaps doesn't exist. A simpler world, where time slows down, or even stands still... even if it's just for a moment...
Until next time... Keep those shutters firing!
Also, with +Alex Luyckx and +Mathew Marrash, who have both been asked similar questions, I have wondered this very thing myself.
Why do I shoot Large Format...
It's a complicated question, that is not easily answered. One reason I can think of, is quite simple. It is very relaxing. I enjoy shooting formats like 35mm, and 120.. but there is something that feels too fast about those formats. In a "never stop, never slow-down" world, I like the fact that there's something that cannot be done quickly.
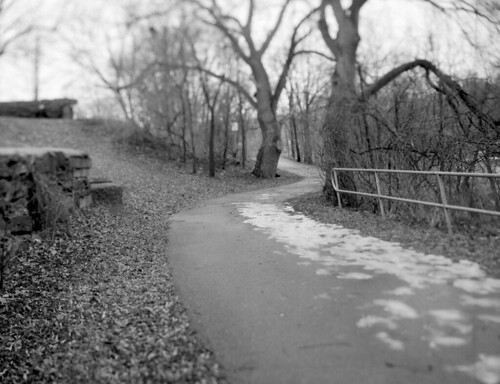 |
| "Winding" - Shanghai GP3 |
When I find myself looking for something far more relaxing and enjoyable than pointing a camera at a subject, and releasing the shutter without much though, I turn to my 4x5. Sure, I wander around with a massive Monorail, but there is something about these amazing cameras. They have immense capability.
The incredible amounts of movement on them, such as swing, tilt, shift, rise or fall, it gives a whole new dimension to the photo.
Take the image above. I'm able to keep the path in focus, while throwing other areas, such as the trees at the top of the image, out of focus, keeping your eyes centered on the path moving through the image.
Plus you can take a single film, and change your entire Metering Index for each shot. A 400 speed film can be 100, or even 800, giving different looks without ever changing your film. Just change your developing.
The incredible amounts of movement on them, such as swing, tilt, shift, rise or fall, it gives a whole new dimension to the photo.
Take the image above. I'm able to keep the path in focus, while throwing other areas, such as the trees at the top of the image, out of focus, keeping your eyes centered on the path moving through the image.
Plus you can take a single film, and change your entire Metering Index for each shot. A 400 speed film can be 100, or even 800, giving different looks without ever changing your film. Just change your developing.
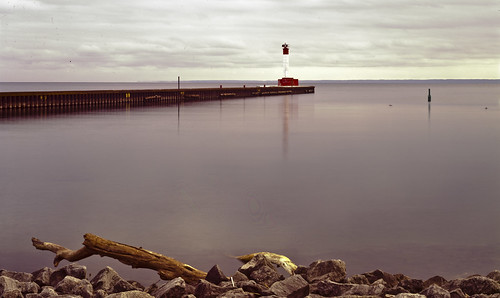 |
| "Oakville Lighthouse" - Fuji Provia 100F |
When you shoot colour, it takes on a whole different dimension. The detail begins to pop right out.
Colour takes on a whole new depth, and the clarity is unobtainable through any other means. Sure, it's only 4x5, but if you take a look at a regular printed photograph that you get from your Local Walmart, from a digital or 35mm print, you'll notice that the print dimensions are 4x6.
Now imagine a negative, or a transparency, that is basically taken on a sheet of film that is just 1" narrower
than the 4x6 print.
To this day, I still remember the very first time I got my hands on my 4x5 Monorail. Browsing the Kijiji website, I just so happened upon someone who was selling a Calumet CC400 with lensboard, case, 5 film holders, a pack of Fuji Provia 100F, and some other various stuff for a very inexpensive price.
All I needed was a lens, and I was ready to go!
So I popped onto that great auction site and got myself a Schneider-Kreuznach Symmar-S 210mm ƒ/5.6 Linhof lens for a price that I have never found again.
After I got the lens I designed, and made, my own lensboard. Painting the front Red, it really made it stand out. The lensboard takes in the "Calumet" red dot logo and blends it seamlessly with the surrounding Bluish-Gray finish of the rest of the camera.
It really looks quite sharp! Those that have seen the lensboard always remark at how lovely it looks.
The next lens I picked up was an old Kodak Ektar 127mm ƒ/4.7 Wide-Angle lens, commonly found on a Speed Graphic, such as what +Alex Luyckx has. It has such a wide image circle, that I think it'll even cover 5x7 film! It gives me movements on 4x5, and like many Kodak lenses, is incredibly sharp.
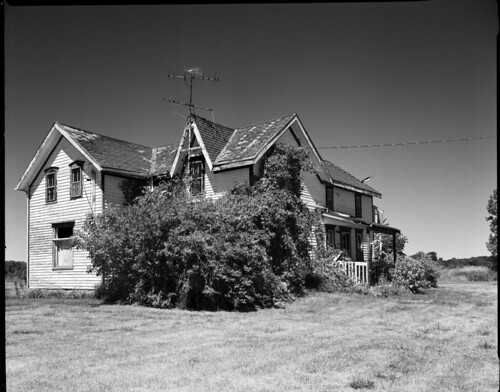 |
| "Rundown" - EFKE IR820C w/Red Filter (Kodak Ektar 127mm) |
Lets look at it a different way. Why not shoot large format? Well, simple. The gear is heavy, cumbersome, expensive, and not easy to transport.
There are film holders, different lenses and boards, big heavy tripods, and enough movements to make your head spin.
But at the same time, when you are shooting a 35mm camera, or even that dSLR, you have a very limited perspective to think of. Where, I find, Large Format lets you take a whole different perspective when shooting.
You can shoot at an angle, and by adjusting your lens angle you can get straight lines and correct perspectives.
Plus, you slow down.
In a world where the digital camera can fire off 30 frames in a few seconds, the large format camera lets you stop, relax, and focus.
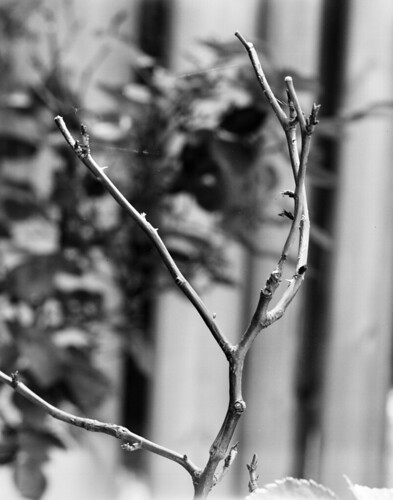 |
| "Spidersilk" - Fuji Provia 100F (Schneider-Kreuznach 210mm) |
Then you have to take a light reading. Well, when I took this, the sun was blasting down through the sky and blowing some parts of the image out. I was shooting a transparency after all, and wanted some of that powerful light to be behind some clouds. So I waited.... and waited... and waited....
After what seemed an eternity (was just short of two hours) I found the sunlight starting to wane.. then finally that harsh glaring light softened down.
Quickly taking a ready, and factoring in the bellows draw, I dialed in the settings on my lens, and the shutter.
Loading the film holder, drawing out the darkslide, then releasing the shutter, I knew I had the image I was after.
It was then that disaster struck. I forgot to label the holder properly, or note it in my book what was loaded.
So I ended up with this film being loaded into the tank along with many other B&W sheets to be processed in HC-110 Dil. H.
Sure enough, however, the image is nothing less than amazing. Super smooth, and incredibly well toned! I couldn't have gotten a better image if I tried.
It almost feels like it just works better in B&W than it ever could in colour.
My wife complains at times when I take the 4x5 our on a walk. "Why are you taking that thing for?? It's so big and heavy, and takes you forever to take a single photo!"
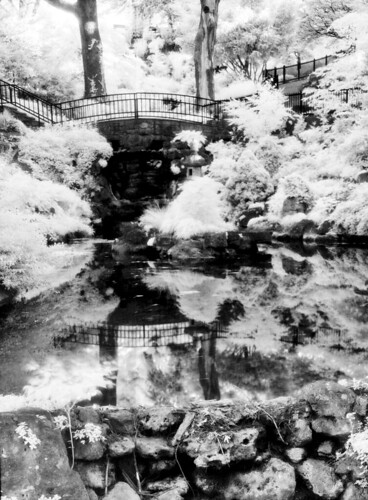 |
| "IR Garden" - EFKE IR 820C Hoya R72 Filter |
The image in my mind was perfect...
I lined it up in the camera, stopped down the lens, and just envisioned it.
Metering the shot as best as I could, I got the shutter ready and released it....
Tick... tick.... tick... tick.... 45 seconds ticked by....... then finally 90 seconds was reached, which was right on the money for what I metered for, and I closed the shutter....
I knew instantly that i had exactly what I was after...
Sure enough, the image, when I got the film developed, popped out and stared at me. The negative was just beautiful!
My very first IR image had been captured.. Unlike many others who shot their first IR on 35mm or even 120.. I did it on 4x5! And I was absolutely in love with IR! So much so that I bought a roll of Efke IR 820C in 35mm... It makes you slow down as well, shooting IR.
Then there is the old lenses that you find on old Kodak Folders, or the old Rapid Rectilinear lenses, or even Achromatic lenses.
These are dual element lenses that are either cemented together (Achromatic) or separated by a pocket of air (Rectilinear). The difference is that the Rectilinear lenses are actually convertible. Remove one of the elements and you can get a Telephoto effect, or a Wide-Angle effect. Most often it's a "TELEPHOTO" effect.
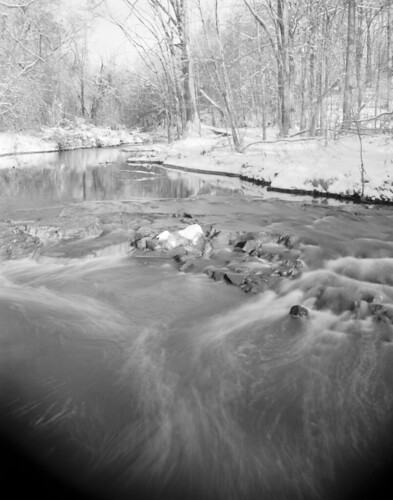 |
| "Running" - Ilford FP4+ (Kodak Rapid Rectilinear) |
And I can tell you right now, that was the best choice I could have made for these old cameras! The camera is just a light tight box, but if I can't use it, why let the lens, which is a beautiful piece of workmanship, go to waste?
So I did some testing. One of those tests was with some Ilford FP4+ and the lens during the winter.
Visiting one of my old haunts, the Trethewey Wetlands, I took a photo of the serene and glass-like Black Creek river.
What a beautiful site! I knew that as soon as I closed the shutter I had the image that would make me remember about why I shoot 4x5 film. Why large format is so special to me... and why I could never give it up....
Sure enough, this image has made its way onto my wall in the size of 11x14, but it doesn't even begin to do it justice. It needs to be bigger.... 16x20? Probably even bigger... It just had to be bigger! It has so much immense detail, and has such a feeling of serenity and peacfulness....... An image that can probably spend the next many years being reprinted over and over again..
But finally.... What I dare to dream of doing with my big camera... Shoot portraits..
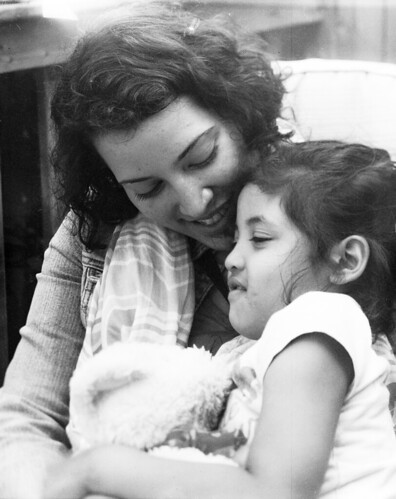 |
| "Mother and Daughter" Fomapan 400 (Schneider-Kreuznach 210mm) |
This is one of them. Sure, it's not the best for that "Candid" moment, but sometime the stars align, and you are able to capture that moment, just by being there, and being ready.
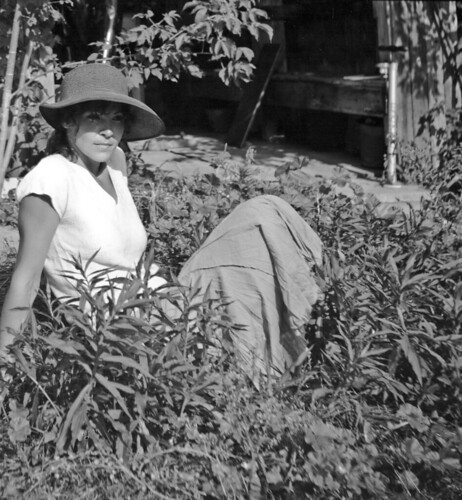 |
| "In The Field" - EFKE IR820C (Baush & Lomb Rapid Rectilinear) No Filter |
Then focus, and pay attention to your surroundings, the light, the position of your subject. How the background portrays with your subject, and ultimately, what the photo means to you. Does it tell a proper story?
Even when you shoot a digital format camera, you can easily just slow down, and relax. Take a breather and visualize the image before you before you even take the photo...
It'll materialize in your head, and when it does, then release the shutter.
You'll be much happier when you do..
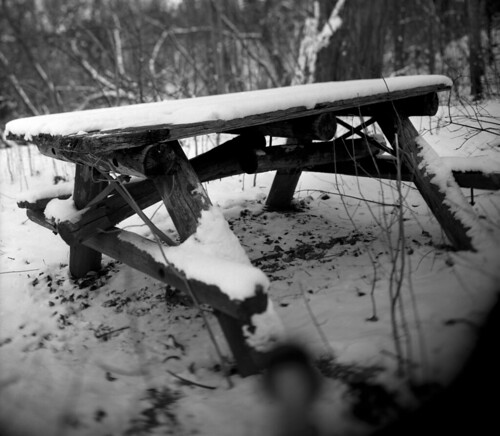 |
| "Ghostly Sitting" - Shanghai GP3 (Carl Zeiss Jena 105mm) |
I was so close, but again, the shot eluded me.
Sadly, this bench is no longer in this location, but has been moved... Now the image I must visualize again...
And hopefully one day, with the right equipment, I'll get the image I was after...
So why do I shoot Large Format Film?
The simplest answer is this...
Because it lets me imagine a world that perhaps doesn't exist. A simpler world, where time slows down, or even stands still... even if it's just for a moment...
Until next time... Keep those shutters firing!
Thursday, February 27, 2014
Returning To Kodak
This year I have decided to shoot a lot more 4x5 film. That means much less shooting, and more concentration on making sure that the shot counts!
Using my Calumet CC400 Monorail is not the easiest camera to use in the field.
Alright, lets face it, it is downright near on impossible, but I do it! I get it into the field all the time that I can and use it. Whether it is a wide-angle, standard, or a telephoto lens, I just find it most relaxing.
I have entirely dedicated this year to three film stocks. FP4+, HP5+ and Fomapan 400. I love all three films, but have a preference to HP5+ just because it is such a gorgeous film! That said, however, I cannot deny the classic emulsion of Fomapan 400, and the wonderful contrast of FP4+.
I returned to the Kodak Plant here in Toronto, well at least what is left of it. I spent a fair amount of time here in the past, and plan on revisiting it again, this time with more film, and possibly some EKTAR 100 and Provia 100 for some of the desolation and using my ultra-wide angle lenses. Although those Ultra-wides aren't QUITE up to 4x5 snuff, but really damn close enough to work. Those lenses would be the ones I pulled off a pair of Kodak Brownie folders, and one off a Agfa Billy Record. Some 105mm lenses off the Billy Record, which normally covers 6x9 beautifully, but actually gives some really lovely coverage on 4x5 film as well.
I wandered into the plant and had one shot in mind. The front foyer and stairs. Once a grand entrance, with beautiful brasswork and wood rails and marble stairs, they now lay in complete ruin and are no longer the joy they must have once been to look at.
I visited this place recently with my Kodak Signet 35 and Kodak Gold film during my previous 52-rolls and made it the finale to the Month of Kodak in March of 2013. This time however, I will be entirely dedicating my time to 4x5 film. As such, a month of Kodak would entail using ONLY Kodak Film with a Kodak lens. Since I have not committed to Kodak film this year, that will have to pass.
I wish I had +Mathew Marrash's Kodak Commercial D 8x10 camera with one of his gorgeous Field Ektar lenses, but alas, I do not.
My wife, +Donna Bitaxi, worked for Kodak many years ago at this very facility. But when they decided to consolidate their chemicals into a third party company, and began the shift away from traditional B&W photo papers, their plant closed. My wife, offered a position and moving expenses to travel to a different location in British Columbia, declined the offer, and stayed in Toronto, where she eventually met me.
She worked in the Black and White Photopaper packaging department, and like many of us, spent plenty of time under a red Safe-Light.
Sadly, in 2005, this plant closed its doors for good. In late 2006 the demolition companies were called in and within a couple of short years the plant, save for Kodak Building #9, was erased from the map forever.
Who owns this land and the last building upon it, I do not know, but it is a place for firebugs, graffiti artists, vagrants, and Urban Explorers. I took a few Digital Images where I was there this time, as I had my Rebel XS and 50mm lens, and figured it would be the best choice to capture some quick shots.
Today, this is what the stairwell looks like. Crumbling, broken, and ruined. A sad testament to what it once was, and possibly what lies ahead for the Film Giant in the future.
Until next time fellow bloggers... Keep this shutters firing!
Using my Calumet CC400 Monorail is not the easiest camera to use in the field.
Alright, lets face it, it is downright near on impossible, but I do it! I get it into the field all the time that I can and use it. Whether it is a wide-angle, standard, or a telephoto lens, I just find it most relaxing.
I have entirely dedicated this year to three film stocks. FP4+, HP5+ and Fomapan 400. I love all three films, but have a preference to HP5+ just because it is such a gorgeous film! That said, however, I cannot deny the classic emulsion of Fomapan 400, and the wonderful contrast of FP4+.
I returned to the Kodak Plant here in Toronto, well at least what is left of it. I spent a fair amount of time here in the past, and plan on revisiting it again, this time with more film, and possibly some EKTAR 100 and Provia 100 for some of the desolation and using my ultra-wide angle lenses. Although those Ultra-wides aren't QUITE up to 4x5 snuff, but really damn close enough to work. Those lenses would be the ones I pulled off a pair of Kodak Brownie folders, and one off a Agfa Billy Record. Some 105mm lenses off the Billy Record, which normally covers 6x9 beautifully, but actually gives some really lovely coverage on 4x5 film as well.
I wandered into the plant and had one shot in mind. The front foyer and stairs. Once a grand entrance, with beautiful brasswork and wood rails and marble stairs, they now lay in complete ruin and are no longer the joy they must have once been to look at.
I visited this place recently with my Kodak Signet 35 and Kodak Gold film during my previous 52-rolls and made it the finale to the Month of Kodak in March of 2013. This time however, I will be entirely dedicating my time to 4x5 film. As such, a month of Kodak would entail using ONLY Kodak Film with a Kodak lens. Since I have not committed to Kodak film this year, that will have to pass.
I wish I had +Mathew Marrash's Kodak Commercial D 8x10 camera with one of his gorgeous Field Ektar lenses, but alas, I do not.
My wife, +Donna Bitaxi, worked for Kodak many years ago at this very facility. But when they decided to consolidate their chemicals into a third party company, and began the shift away from traditional B&W photo papers, their plant closed. My wife, offered a position and moving expenses to travel to a different location in British Columbia, declined the offer, and stayed in Toronto, where she eventually met me.
She worked in the Black and White Photopaper packaging department, and like many of us, spent plenty of time under a red Safe-Light.
Sadly, in 2005, this plant closed its doors for good. In late 2006 the demolition companies were called in and within a couple of short years the plant, save for Kodak Building #9, was erased from the map forever.
Who owns this land and the last building upon it, I do not know, but it is a place for firebugs, graffiti artists, vagrants, and Urban Explorers. I took a few Digital Images where I was there this time, as I had my Rebel XS and 50mm lens, and figured it would be the best choice to capture some quick shots.
 |
| Image taken on a Calumet CC400 4x5 Monorail, Kodak Ektar 127mm ƒ/4.7, Ilford FP4+ 125 @ 125ASA under natural light. Exposure 8s at ƒ/8. Metered for a 4s exposure and added 4s for Reciprocity. |
Until next time fellow bloggers... Keep this shutters firing!
Subscribe to:
Posts (Atom)