Showing posts with label B&W. Show all posts

Tuesday, August 22, 2017

The Toronto Film Shooters Large Format Meetup


This weekend is the Toronto Film Shooters large format meetup.  I'm really looking forward to getting my big camera out into Toronto again.  I've been to High Park a few times with that beast, but this time we go en masse! It's going to be a great  outing!

I know, large format is slow, cumbersome, heavy and quite daunting at times, but it's going to be fun. I'm planning on practicing some shallow DOF shots, maybe a portrait or two, never know...

Stay tuned... but for now, enjoy some of the Large Format images I've shot previously....

.... and keep those shutters firing!


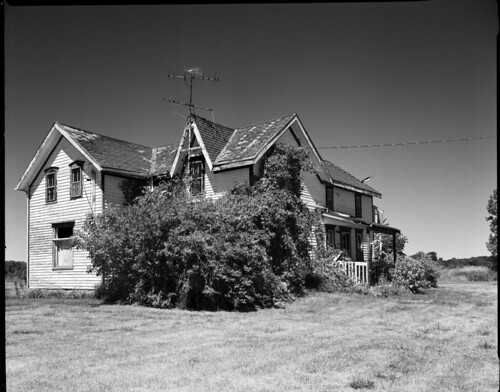
Rundown
Calumet CC400 - Ektar 127mm - EFKE 820C
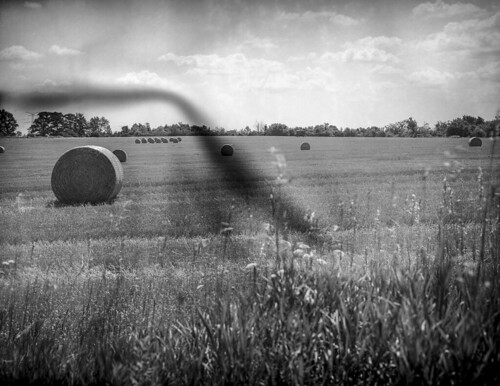
Farmland
Calumet CC400 - Schneider 180mm - Kodak TriX (1971 Expired)
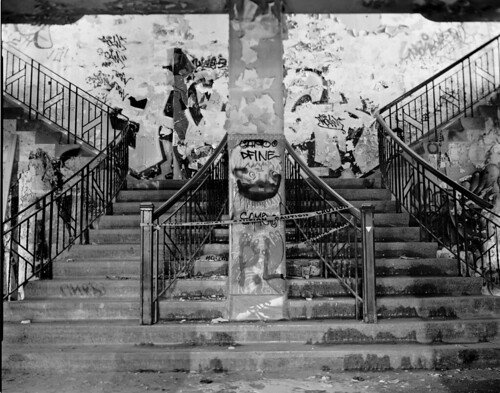
Returned To Kodak
Calumet CC400 - Ektar 127mm - Ilford FP4+
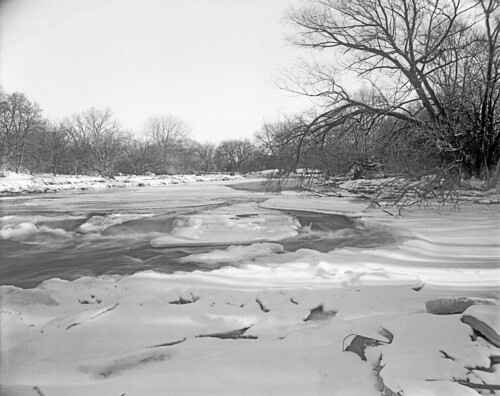
Frozen Humber
Calumet CC400 - Agfa Anastigmat 105mm - FP4+
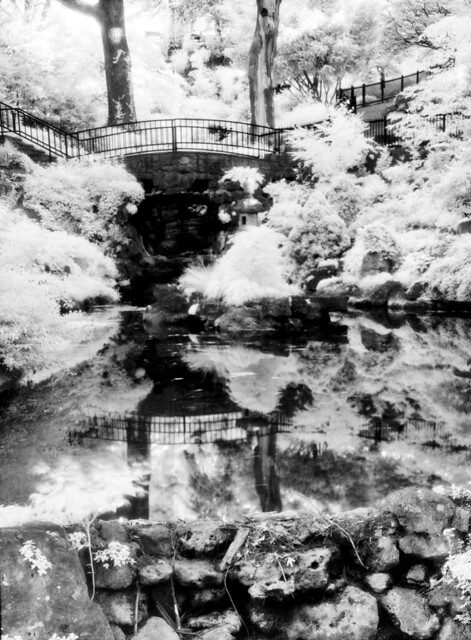
IR Garden
Calumet CC400 - Schneider 210mm - EFKE 820C

Friday, August 11, 2017

TFSM Informal August Long Weekend Meetup


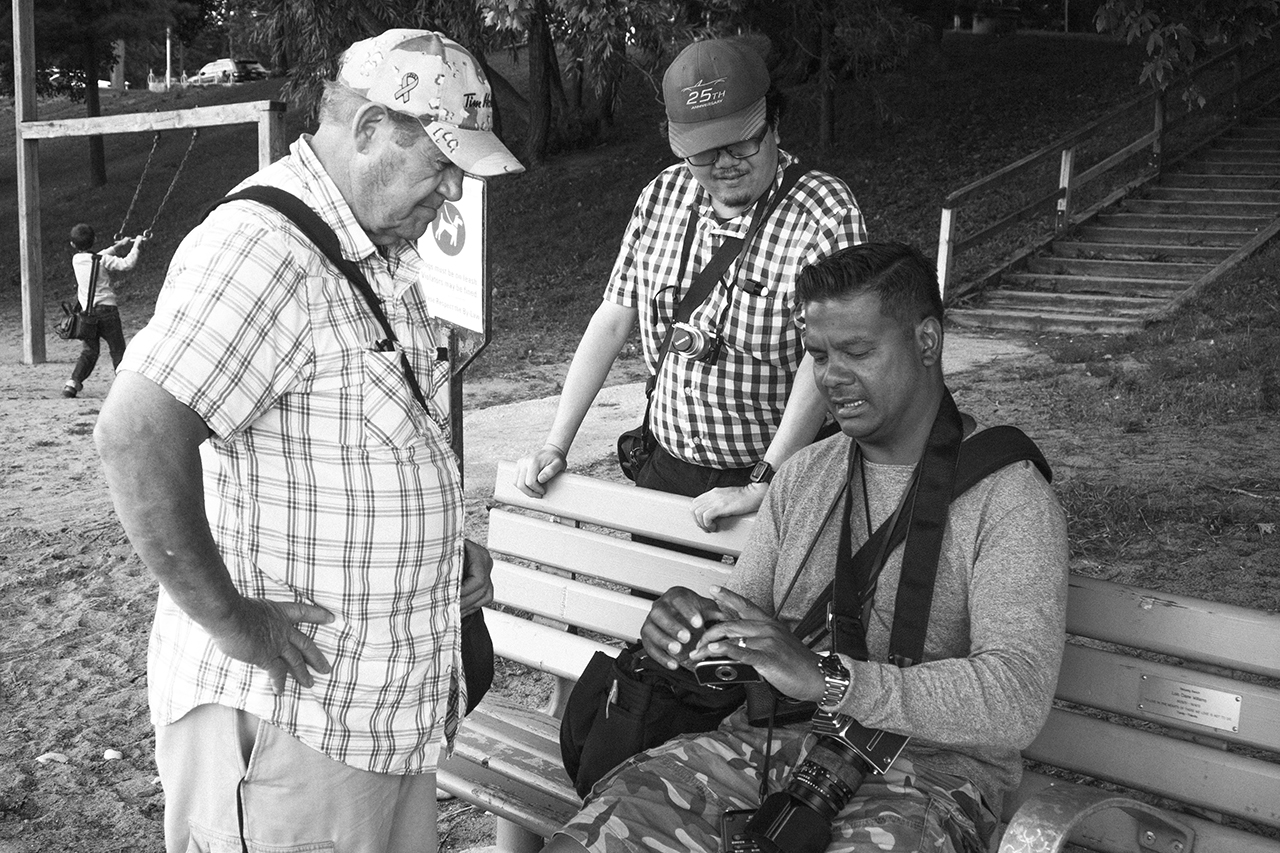
On the 5th, the Toronto Filmshooters Group, as suggested and Organized by +Bill Smith, got together for a walk in the Beaches.  Starting at "THE REMARKABLE BEAN" and finishing at a little craft brewery on Eastern Avenue called Rorschach Brewing Co.

Along the way made for some interesting shooting, but I didn't just have a 35mm SLR around my neck.. Nope, I had a dSLR to capture some quick shots around and to get some shots of the gang out there shooting ...


Of course, what TFSM photo walk is complete without some film shots, considering it is a TFSM meetup!


All film images were taken on the Argus A2 Pre-War model on Rollei Superpan 200 and developed in TMAX Developer.

Until next time everyone, keep those shutters firing!

Sunday, August 6, 2017

Getting Things Back Underway

Contaflex Super BC - Pro-Tessar 35mm ƒ/3.2 - Polypan F
So I admit, I've been absent from the Blog Scene for a bit.. But I'm coming back to it. Life is less hectic and much more relaxed now that I've managed to find a groove in things. I was taking a break for the summer from work and focusing on just relaxing and shooting film.  I made a point, also, of, during my days at school, to take a camera every single day, except during exam week. I took a new camera to school every week until the final week of school, because I literally was there for an hour or two at most, then back home to not study and develop a roll or two.. Maybe veg in front of the television and watch Netflix...

Ended up getting into woodworking and thinking of a couple projects... yes, a few are photography related, but I won't get into that.. Wait until they're done, then I'll post about them.

For now, I plan on posting a new blog a minimum of one a week, possibly as many as 4 or 5 per week, depending on how things go.
Kodak Pony 35 Model C -
44mm ƒ/3.5Kodak Anastigmat
Polypan F 50

I'm also starting up a small gallery website.. Nothing fancy, which currently is basically... nothing.. But I'll be posting images up there for viewing and, of course, to order a print or two... maybe even a photobook!

It'll be nice to finally have a public gallery instead of just Flickr or Facebook... Of course this blog, or even my Google+ profile, which has very limited photos

Anyway, stay tuned, we've got more things coming.. Also, don't forget, I'm broadcasting every month from the revolving Classic Camera Revival studio...

Talk to you all soon!

Remember, keep those shutters firing!


Zenza Bronica SQ-Ai - Zenzanon 80mm ƒ/2.8 - Kodak TMAX400


Friday, August 4, 2017

Mamiya M645 1000s First Look


I took my wife's Mamiya 645 1000s out for a first look. I haven't used a Mamiya before this and I tell you one thing, I am very happy I got the chance to take it out. Wish I hadn't shot the second half roll of +Donna Bitaxi, but I am sure she'll understand.
The low down is that this is a very light modular camera with a lot of options and a lot of promise.  A camera I would highly recommend you give a second look at, but be forewarned, there is only one film back, which is non-removeable. So if you want to be able to change film-backs mid-roll, you might want to look elsewhere.

Mamiya M645 1000s - Mamiya Sekor 80mm ƒ/2.8 - Ilford HP5+ - TMAX Developer 1+4

Mamiya M645 1000s - Mamiya Sekor 80mm ƒ/2.8 - Ilford HP5+ - TMAX Developer 1+4

Mamiya M645 1000s - Mamiya Sekor 80mm ƒ/2.8 - Ilford HP5+ - TMAX Developer 1+4

Thursday, August 3, 2017

Expired Tri-X Farm

It never ceases to amaze me at how well Expired Film can still look, even almost 50 years later. Here is a shot using Expired Kodak Tri-X from the early 70s (expired 1971) yet it still looks fantastic.  Sure there are some anomalies with the film, but nothing I am worried about considering the age.

I tell you one thing, it was definitely nice to get out there shooting my 4x5 again!


Calumet CC400 - Schneider Kreuznach Symmar 180mm ƒ/5.6 @ ƒ/22 w/#25a Red Filter - ½s Exposure
Kodak TriX Expired 1971

Wednesday, August 2, 2017

Found Film

Kodak Tri-X Found Film

After buying a 4x5 Graphic film pack of Kodak Tri-X off EBAY I noticed it was on photo 10/16 when I got it.  So I did what I learned from experience shooting other old expired Tri-X. Rate for 50 and don't expect miracles.  Needless to say, I got more than I expected.  Not only did I find this, a previously exposed image from whoever originally owned this pack, but a super clean negative that I can really work with!  Just incredible.. When I pulled it out of the tank, I am telling you right now, the low amount of base-fog , you'd swear this was shot yesterday!  It's just that clear... Sure, you can see some degradation of the substrate and emulsion, but nothing that doesn't hurt the image at all.

Always amazed at the power of film!  This is one of the reasons i usually buy this old Tri-X. It's inexpensive and usually gives acceptable results with unique looks.


Wednesday, April 5, 2017

Looking Up

So last weekend I tried something a little different for a change.  Instead of just looking at what is around me and in front of me, while in Downtown Toronto, I decided to try... looking up... for a different perspective on things..

The results I got were actually quite inspiring.  I think I like this idea of upward perspective photography.. It makes you really take a different approach to how you view things..

Canon T90 - Canon 35-105mm ƒ/3.5 - Kodak Tri-X 400 - SPUR-HRX 1+17

Canon T90 - Osawa 24mm ƒ/2.8 - Kodak Tri-X - SPUR-HRX 1+17
Canon T90 - Canon 35-105mm ƒ/3.5 - Kodak Tri-X - HC-110 Dil. B
I'm really impressed with how everything turned out. I think I'll do a bit more of this whole.. shooting up thing. heh..

Anyway.. Until next time, keep those shutters firing!

Friday, May 8, 2015

Roll Reversal - A Safe Alternative

Many people who know me know that I am all for experimentation with film.  One film I have done excessive amounts of experimentation with is Polypan F.  The one thing I have never done is REVERSAL of it.  I have done reversal with SCALA and Foma 100R (films made for reversal). And lets not forget the Kodak Cinecopy #5363 that I used.  


Soft Bokeh


The one problem with doing Reversals yourself is the harsh chemicals.  Potassium Permaganate is one thing (Found in fish medicine to treat Ich (pronounced Ick)).  The other chemical is Sulfuric Acid.  That is battery acid!  VERY bad chemical to have. It's ... well... acid!  Let's face it Acid is not person friendly, let alone safe and kid friendly!  Those with kids, not the easiest to have these kind of chemicals around.

The other option is to send to Dr5.com, which is a great way to get some absolutely stunning reversals!  However, what if you are not in a place where shipping a roll of film to DR5 is economical... What about doing it yourself without using harsh chemicals... Is there a way?

Apparently there is.  +Kelly-Shane Fuller, who is known for his E3 reversal in modern terms using HC-110 and C-41 to get E3 reversals with more stable colour dyes than the original E3 process...

Well.... lets look at his Chemically Safe B&W Reversal process..
For one, you use Hydrogen Peroxide (available the world over at drug stores) 3% which is as safe as it gets, considering you can pour it over an open wound to clean it out.  The other is Vinegar... Good old fashioned White Vinegar, which is a great thing... You can mix it to make a B&W bleach, or... pour it on your fries....

So he made a 260mL solution...  How?  Let's get into it;

250mL Hydrogen Peroxide 3%

10mL (2 tsp) White Vinegar
Heat to 150°F

So that's it...

Steps required;

Develop Film as normal using your favorite B&W developer...
BLEACH 6 Minutes
Fully Expose to light (take out of the container and off the reel)
Re-Develop to finality (you can reuse your Developer you poured out)
FIX

Wash
Photoflo
Dry

Then you get some beautiful slides!


B&W slide test 1
Kodachrome 64 (Expired) As B&W Slide
Yeah, that's right.  KODACHROME as a slide again! Sadly, no colour, but hey, a Kodachrome slide is something to behold!  Regardless of how it is...
B&W slide test 2


B&W slide test 3

Then there is Polypan F (care of your's truly)... It is absolutely stunning!  I couldn't believe the tonality he got out of itI sent him a few rolls of Polypan F down and he finally got around to trying it out... Man.... Not only did I get him hooked on Polypan (It's an easy thing to do) but he is stunned too over the amazing tonality and look of this film as a reversal.
I'm all for B&W reversal.. And the fact that you can now use a much much MUCH more kid friendly version of the bleach..

Thanks Kelly-Shane Fuller!  

Stay tuned as photos of the film on a light table and under room light to show they are "SLIDES" will be posted later..

Can't wait to try this process myself!!
So until next time... Let's keep those shutters firing!

All images were used with permission from the original author and are direct linked from his Flickr stream.
Images are protected under International Copyright Law.  Use without permission is strictly prohibited.

Monday, March 2, 2015

Continuing The Tradition...

Today was a little different for me.  I was on my way home and I drove passed a local camera and film supply chain, known as Henrys.  (www.henrys.com).
I'm always a weakling when it comes to film and camera stores.  Well I decided to pop in and see what they had, and sure enough there was some Ilford MGIV 16x20 paper.  I thought I grabbed the Fibre based, but instead I grabbed RC.  Ah well, that's okay, I'll be able to work with it that way no problem, especially since I have a couple of photos I am dying to turn into 16x20 prints!
Now to find some 16x20 trays... Yes I bought paper I cannot develop yet, shaddup!  It's a smart idea, because now I have no excuse but to find some!

maybe I'll pop into a hardware store and improvise somehow...
ABS tubing perhaps??

Anyway, onto the main part of this post.  Although I am not shooting quite as much film this year as others, I am making up for it by getting caught up on printing.  I do not believe for a moment that a photo should live as a negative or a scan, or even on a computer, but should be finalized as a print.  If you want to feel something for that photo you love, make a print...

Well, my eldest (almost 7) he saw the big pack of paper and thought it was neat... Since he's learning to read and wanted to know what it was I had him sound it all out.

"ILFORD PHOTOGRAPHIC PAPER"...

Took about 5 minutes of work and sounding it out syllable by syllable, but he felt very very proud of himself to be able to do it.

Sure enough they wanted to know what I do with this paper, so I told them.  BUT that wasn't enough.. Looking at the time I realized, yeah I have enough time before dinner... So I said, "alright, come with me, but it'll be really dark down there!"
Didn't phase them at all, especially the youngest who has no problem with the dark.  Eldest, well, he's a little scared of the dark.

Well they came down with their little flashlights to light the way, and waltzed over to my darkroom.  Sitting down on the milk-crates I gave them a dry walkthrough of how it works.
I showed them picking the negative and loading it into the holder, to how it looks projected down onto the paper.
They even looked through my grain focuser to see the image and how it is focused.

After a dry run with the lights off, they asked if they could see me make a print.
I took my youngest's flashlight (he doesn't quite understand) and let him pull the chain to turn off the light.
Flipping the switch on my Besseler 45MXT to turn on the safelight so they could see (and myself included) I filled the trays with the Developer (which is close to a year old, has been mixed with some Ilfosol-3 and D76, don't ask, and looks like really bad Guiness), Stop and Fix (fix at least is very fresh as I just mixed it less than 24 hours previous).
After that was done I told them to both stand up and see the image as I "stop down" the lens.  They thought that was neat, but thought it was even cooler to see the iris of the lens I was holding up (Schneider-Componen 80mm ƒ/5.6 for 645 and 6x6 negatives) to show them why the light was dimming as the iris closed.

After that was set (ƒ/8 on the lens) I set the timer on the enlarger (using my Bogens 69 Special for 35mm) to 30s.  I rarely do test strips, as I seem to be able to just look at the light and know the time required to make the print.. Don't ask, but so far I've never been wrong with RC paper (track record isn't quite as good with Fibre).
Under the safelight I showed them the 8x10 paper I was going to use (Ilford MGIV Satin RC) and how it has two sides.  The matte rough side, which is the back, and the smooth shiny side that is for printing.  They got to feel it and thought it was really cool!
Loading it into my Easel I turned off the safelight and said, okay now we do the print!

I flipped the switch on the timer and told my littlest to stand beside his big brother (who was still sitting) so he could see what was happening.
As the timer silently clicked down to 0 I told them that the next part will be like magic.
The room went black again....  I flipped on the safelight and pulled the paper out of the easel and told them to stand up and stand over beside the developing tray.

Here comes the magic....

I put the paper into the developer and started rocking the tray gently... back.... and forth..
10 seconds... back and forth...
20 seconds... back and forth...

Then the magic happened.... The image started to come to light and the kids expression... "wow!  I see it, daddy... I see it!"
30 seconds...

And for almost 2 minutes in the developer the image was finally done...

Into the stop for 10 seconds and finally the fix for 5 minutes...

The lights came on and the kids were amazed at the magic of the print..  After explaining to them how it all works and explaining to my eldest how two negatives create the positive image and why you get a negative when you shoot film (not that I really expect him to remember it) I dumped the chemicals back into their respective bottles and up to the bathroom to wash the print...

So I showed my kids the process that is more than a century and a half old, and still holds the magic for me today as it did the first time I ever saw a print appear in the developing tray....
Frozen WalkThis print will be a little special for me, as it is the first print I made with my two boys...

Made on Ilford MGIV RC Satin from a negative originally taken on Svema Blue Sensitive film shot on a Canon T90 with a Osawa 24mm ƒ/2.8 lens.  Film developed in Ilfosol-3 1+14 for 6 minutes...

Until next time, keep those shutters firing!

Friday, January 30, 2015

Svema BLUE

Recently +Michael Raso of the FPP sent me a tester care package... So, I got to testing the film!
During the winter months I find myself preferring to staying inside and printing and getting caught up with scanning my negatives.

Either way, as a FPP tester I get rolls of film regularly from them to test.
One of those rolls was known as Svema Blue Sensitive film.  I just call it BLUE for short.  It's a very slow (1.5EI) 35mm blue light sensitive film, which is essentially entirely blind to any other light but blue light.

I have a roll currently in my Olympus Trip-35 that is being exposed at EI4, but the one I am going to be talking about and showcasing on this post is the roll I put through my Canon T90 using a 24mm ƒ/2.8 Osawa MC lens.  The lens is really lovely, and quite sharp even basically wide open, however it does suffer from softness in the corners as expected for this type of lens.  However, it is rectilinear, so you don't get barrel distortion, which I think is one of the most important things for this lens!
A nice flat field, not curved!
upl - T90BlueScan-150126-0002
Slow Motion - Canon T90 - Osawa 24mm ƒ/2.8 MC
Earlier this month I was on a photowalk with Alex Luyckx, John Meadows and Ori Carmona (not to mention several other Film-Shooters), and that was the day I had loaded my Canon T90 with some of this UBER slow BLUE film.
Although the film is Blue-Light sensitive, oddly enough, it is yellow in colour.

I wanted to finish this roll, but the light (and my camera) definitely weren't cooperating.
The light was dim, and the weather was cold... My camera didn't seem to like the low-light and cold temps and gave me a EEE error. Strange..
Tried it again after resetting the EEE... same error..
So I put the camera away..

A few days later (just over a week actually) I took the camera out again in much much better light.  Bright blue skies and yet even more bitterly cold.  When I had -2°C and dull over-cast to -11°C and super bright sunlight (yeah you see where this is going?) I thought I'd have the same problem.
Nope, the camera loved the day instead.  Guess it didn't like the over-cast!  I know I didn't, but I still got some rather impressive images that day.
The photos from the Sunday (a week later).. well...
Lets just say I quickly fell absolutely in love with this film!  Darn Michael Raso sending me this film for testing, but I tell you... The other 2 rolls that I have to play with are going to get similar attention to detail, and will be used under identical light conditions.  HOWEVER one will be saved for the summer light and warmth.  Sorry, but I can only take so many -11°C or colder days!
upl - T90BlueScan-150126-0017
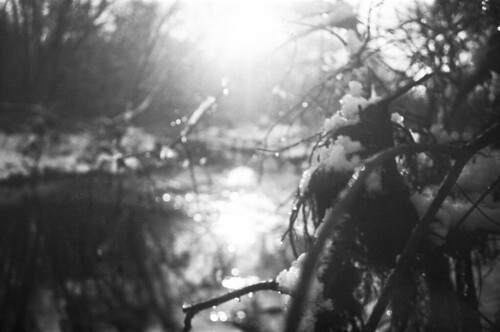
Boardwalk - Canon T90 - Osawa 24mm ƒ/2.8
upl - T90BlueScan-150126-0015
Clutching Branches - Canon T90 - Osawa 24mm ƒ/2.8
upl - edit T90BlueScan-150126-0009
Lakeside Bike Ride - Canon T90 - Osawa 24mm ƒ/2.8
I must admit that my favorite shot of the three posted (from Sunday) is the shot of the cyclist on the beach.  I saw him riding, I just timed it to the point where he was just about under the sun so that I can get the most out of the lens-flare and the reflection of the sun off the water...
Yes, this image will definitely be getting a print.  It's just too good not to print!

Now one of the hardest things to work with on these tester films is developing times.
Since there is essentially no listed times, you have to make up your own and go from there.
I really wanted these shots to work, and so I went with a good staple in my arsenal.  Ilfosol-3 1+14.. My (lately) go to developer!  Yes, I know HC-110 has been my staple developer, but Ilfosol-3 has slowly been taking over for my tester films...!
Well, there's one other thing.  It is not RED LIGHT sensitive.  I went into my darkroom, shut off the over-head and flipped on the safe-light.
However to be safe I loaded the film into the daylight tank in complete darkness.. No sense in possibly fogging it.. Never know!
Set my timer to 12:00 and got the developer all mixed up.
At the 50% mark I opened the tank under the Amber Kodak #13 Safelight and took a look..
Lets just say that at 6 minutes it didn't go back into the tank.  6 minutes was perfect!
I dumped the developer, poured some Ilfostop bath (I was in my darkroom and the Ilfostop was already mixed for prints) then fixed.
A perfect roll!

So until next time fellow shooters, keep those shutters firing!

Thursday, June 19, 2014

B&W Slides - The Easier Method

Recently I've tried making B&W slides using the traditional method of, Develop in a selected developer, such as HC-110, Rodinal, TMAX developer, or whatever other type of developer you want, then bleach in a Potassium Permaganate/Sulfuric Acid mix, fog under light for 60 seconds (or longer) and redevelop using a strong developer like DekTOL stock solution to develop the remaining silver.

The slides were usually okay, but because of the age of the product (probably mostly the clearing agent) the slides weren't the best.  And they are also very very delicate after the bleaching process because of the acid softening the emulsion.

Well, I put a challenge out to +Kelly-Shane Fuller, who I truly hope doesn't mind me stealing his image from Flickr for my own nefarious purposes, to use his HC-110/C41 developing method to create a B&W slide from Ilford's XP2.

His method is as follows;

HC-110 Dil. B @ 30°C for 12:00
Dump and Stop (water stop/acid stop)
Pull out and expose to light.  (Time is not really important, but you want to make sure it's entirely exposed to light).
Redevelop using C-41 Chemicals at prescribed time and temperature for C-41 developing.
Rinse
BLIX (Bleach/Fix)
Stabilize
and finally...
Dry.

This method is tried and true for creating beautiful colour slides using all manner of E6 films, like Velvia, Provia, Astia, Ektachrome, etc.  (No sorry, K-Chromes will NOT work with this method).

Now before you start commenting on colour stability with CD3 instead of CD4 chemicals, or vice versa, I am, as Kelly-Shane is, well aware of that.  It is not something terribly alarming, and this method is probably used for immediate results, but cannot guarantee longevity of the film's colour stability.

For Ilford's XP2 Super film, it is probably more that adequate for this, considering it is a Chromogenic C-41 film, and there is no colour anyway.

So, what image came up? And what image did you steal?

Actually, I only stole the link, and if you click on it, it will link right back to his FLICKR page, and I give him every bit of credit, and support, on his image.

So here it is...

Oh and before I share it, I want to also mention that he accepted the challenge, and blew my mind with the results he got!
So much that I'm going to accept any donated rolls of Ilford XP2 super that you want to get rid of, as I will happily accept them.

That said, however, if you choose to keep your rolls, I will also be purchasing some and giving this a go myself!

So Ilford XP2 Super 400 Speed C-41 Chromogenic B&W film (35mm film) exposed at box speed using a 1958 Yashica 44 (Sprocket Rocket Special)
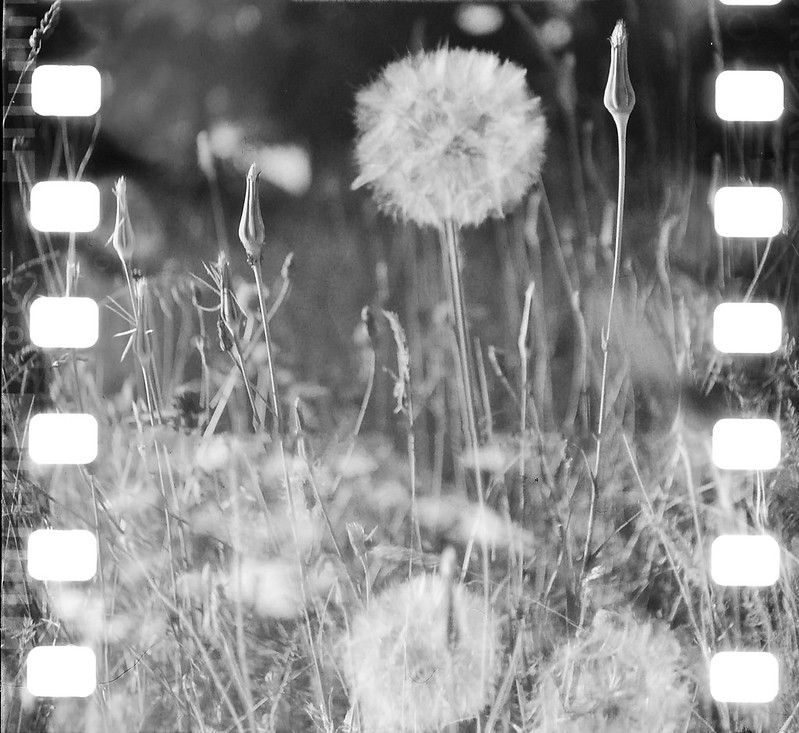

Puff Ball
"Puff Ball" - By Kelly-Shane Fuller - Yashica 44 - Ilford XP2 Super

So until next time, keep those shutters firing!

Image is owned by Kelly-Shane Fuller, and used solely as a example of his prowess with developing films through unconventional methods.