Showing posts with label Analog. Show all posts

Wednesday, August 2, 2017

Found Film

Kodak Tri-X Found Film

After buying a 4x5 Graphic film pack of Kodak Tri-X off EBAY I noticed it was on photo 10/16 when I got it.  So I did what I learned from experience shooting other old expired Tri-X. Rate for 50 and don't expect miracles.  Needless to say, I got more than I expected.  Not only did I find this, a previously exposed image from whoever originally owned this pack, but a super clean negative that I can really work with!  Just incredible.. When I pulled it out of the tank, I am telling you right now, the low amount of base-fog , you'd swear this was shot yesterday!  It's just that clear... Sure, you can see some degradation of the substrate and emulsion, but nothing that doesn't hurt the image at all.

Always amazed at the power of film!  This is one of the reasons i usually buy this old Tri-X. It's inexpensive and usually gives acceptable results with unique looks.


Thursday, April 14, 2016

Choosing Your First (FILM) Camera

Boy it has been a while. Between packing to move, getting the house ready, school, work and life in general, I've been really busy and haven't had a chance to post.  Heck, I've barely been able to shoot any film!  However I do manage to get out from time to time, or just pick up a camera and fire off a frame. If JUST to keep in touch with the film world.

Now, choosing our first camera can be a daunting and troubling thing to do.  Most people choosing their first film camera will be coming from a digital world. How do you pick up that first film camera? I mean... Digital is easy... just set to "A" and off you go, right?
Well, not really.. You can, but you lose the creative control that you should always strive to have when shooting. 

Now I'm not going to talk about being a complete novice to photography. In this idea of picking your first film camera I shall assume that you have at least some experience shooting with a digital camera and have some working knowledge of how exposure works.
You know, how ISO, Aperture and shutter speed play in with each other.  So lets go into the world of your first film camera....

What system do you currently own?  Nikon? Pentax? Sony/Minolta? Canon?  Or do you shoot Leica? It doesn't really matter, actually. One thing that can help you, though, is that if you are shooting any of the above SLRs (Leica is a Rangefinder, relax I know!) you can actually use the modern lenses on their older film bodies. BUT not all the lenses are made the same, nor will they all work.
Modern Nikon lenses most likely will not work on the film bodies, while the older film lenses should mount and work on the modern Nikon Digitals. I cannot truly speak for sure here, as I do not have a Nikon body I can test that theory out. HOWEVER I have used a more modern Sigma (Nikon AF D mount) lens on my Nikkormat and my Nikon F90. It worked flawlessly, so I know that some lenses are backward compatible.  Same goes with Sony, Pentax and Canon. HOWEVER... you cannot use mirrorless lenses on any film body... Period..  The Sony SLR lenses (provided it isn't a crop sensor lens) will mount just fine to a Minolta Autofocus camera and work.  Same goes with Pentax and Canon.  Any and all canon EF (Not EF-S or EF-M) will mount and work on a Canon EOS Film SLR.

All this can easily help play into your first Film Camera.

The next thing is to inspect your camera. One thing that you have to inspect on film cameras that you won't find on a digital are light seals. See, the film door has a foam or felt seal around the edge of the back. The prevents light from entering the back of the camera and exposing the film.
Also on older cameras the mirror bumper (a piece of foam) will also degrade over time and can dissolve onto the mirror itself.
This should also be checked and replaced if necessary.
Next are the shutter curtains themselves.  On newer model they are usually a vertical travel focal plane shutter, usually made of a high grade plastic/compositite. The light seals around those CAN possibly degrade and create a sticky mess on them. This should be checked and cleaned (GENTLY) if possible. If not, sent out for a CLA (CLEAN LUBE ADJUST) to clean that up.

Now onto Rangefinder cameras.  Rangefinders are another camera that has its own share of things to check for. So lets gets started..
Light seals are one of the first things to check. The film door, just like on SLRs, will have foam or felt seals that prevent light from entering and exposing the film. This is very important to check.  If they are degraded they will need replacing.
Next is the mirror in the rangefinder. Are you getting a bright and contrasty double image? Or is it faded?  If it is faded the beam splitter could be fading or the silver on the mirror could be fading. That will need replacing and fixing.
Check the alignments. The horizontal and vertical alignments of the rangefinder. This will tell you if the focus is properly culminated to the lens. If you find that the horizontal alignment is off it will entirely throw off your focus.  First is to go all the way to INFINITY and see if the image lines up in both your viewfinder/rangefinder and the mark on the lens. If you find that the item at INFINITY (at least 100 to 200 feet away) is not lining up (getting a double image) you need to adjust the rangefinder culmination to make sure you don't mess up the focus.
Next is the vertical. Not as critical as the horizontal as it won't cause you to miss your focus, but can if the alignment is too far off. Adjusting the alignments of the rangefinder can be as simple as turning a couple screws... Or as complicated as a disassembly of the entire top of the camera... or more..
The Argus C3 Brick is one of the simplest rangefinders to adjust, where as the Canon 7 is extremely complicated.

Okay, so everything so far has checked out pretty good. Light seals are in decent shape, or can be easily replaced.. Shutter curtains are good, mirror is clean... All in all the camera you chose, rangefinder or SLR, is in good working order... Or is it?
Does it require batteries? Oh crap, it does. CR2... 2CR5.. CR123... AAA... AA.. PX625... LR44.. So big deal.. Pop the batteries in and... What the heck is that green stuff all over the place!?
This is the one thing you have to watch out for with batteries.. Corrosion! Yes how lovely.. But do not despair.. All is not lost. In fact, corrosion is fairly simply to clean up.  Just some white vinegar and some Q-Tips.  Wait?! Vinegar? 
Yes, absolutely!  Vinegar is actually a fairly strong acid. In fact, you can get 3% vinegar, which is basically just Acetic acid.  Using a small amount applied to your cotton swab you can clean out pretty much all the corrosion, which is alkaline based. The Vinegar will cause it to foam and melt away.  Once that is done, you can take a small metal file to brush against the spring contacts to clean them up and add a bit of abrasion to clear off the metal to make a good contact against your battery.
However some battery housings might be more difficult to clean than others.

So everything is good now. Camera is 100% functional... Now what?

That is up to you... Does the camera feel good in your hand? Do you like it?
Ask the owner to let you hold it in your hand for a while... Or is it in a store? Ask if you can walk around with it in the store for a bit.. Maybe they have a lens you can try on it. See how it feels after 10 minutes pretending to snap a photo or three with it.
Still feel good?  Great!

So it looks like things are good.

Remember, picking your first film camera shouldn't be a chore. It should be an inexpensive first purchase. One that you can learn the ins and outs of film photography with.

Another thing that was mentioned to me by fellow photography +Bill Smith is that a consideration should be about the availability of batteries, or about the possibility of a camera repair technician to fix the camera should something ultimately go wrong.  Very good ideas and valuable knowledge to have.

Thanks Bill!

Until next time, keep those shutters firing!

Monday, March 2, 2015

Continuing The Tradition...

Today was a little different for me.  I was on my way home and I drove passed a local camera and film supply chain, known as Henrys.  (www.henrys.com).
I'm always a weakling when it comes to film and camera stores.  Well I decided to pop in and see what they had, and sure enough there was some Ilford MGIV 16x20 paper.  I thought I grabbed the Fibre based, but instead I grabbed RC.  Ah well, that's okay, I'll be able to work with it that way no problem, especially since I have a couple of photos I am dying to turn into 16x20 prints!
Now to find some 16x20 trays... Yes I bought paper I cannot develop yet, shaddup!  It's a smart idea, because now I have no excuse but to find some!

maybe I'll pop into a hardware store and improvise somehow...
ABS tubing perhaps??

Anyway, onto the main part of this post.  Although I am not shooting quite as much film this year as others, I am making up for it by getting caught up on printing.  I do not believe for a moment that a photo should live as a negative or a scan, or even on a computer, but should be finalized as a print.  If you want to feel something for that photo you love, make a print...

Well, my eldest (almost 7) he saw the big pack of paper and thought it was neat... Since he's learning to read and wanted to know what it was I had him sound it all out.

"ILFORD PHOTOGRAPHIC PAPER"...

Took about 5 minutes of work and sounding it out syllable by syllable, but he felt very very proud of himself to be able to do it.

Sure enough they wanted to know what I do with this paper, so I told them.  BUT that wasn't enough.. Looking at the time I realized, yeah I have enough time before dinner... So I said, "alright, come with me, but it'll be really dark down there!"
Didn't phase them at all, especially the youngest who has no problem with the dark.  Eldest, well, he's a little scared of the dark.

Well they came down with their little flashlights to light the way, and waltzed over to my darkroom.  Sitting down on the milk-crates I gave them a dry walkthrough of how it works.
I showed them picking the negative and loading it into the holder, to how it looks projected down onto the paper.
They even looked through my grain focuser to see the image and how it is focused.

After a dry run with the lights off, they asked if they could see me make a print.
I took my youngest's flashlight (he doesn't quite understand) and let him pull the chain to turn off the light.
Flipping the switch on my Besseler 45MXT to turn on the safelight so they could see (and myself included) I filled the trays with the Developer (which is close to a year old, has been mixed with some Ilfosol-3 and D76, don't ask, and looks like really bad Guiness), Stop and Fix (fix at least is very fresh as I just mixed it less than 24 hours previous).
After that was done I told them to both stand up and see the image as I "stop down" the lens.  They thought that was neat, but thought it was even cooler to see the iris of the lens I was holding up (Schneider-Componen 80mm ƒ/5.6 for 645 and 6x6 negatives) to show them why the light was dimming as the iris closed.

After that was set (ƒ/8 on the lens) I set the timer on the enlarger (using my Bogens 69 Special for 35mm) to 30s.  I rarely do test strips, as I seem to be able to just look at the light and know the time required to make the print.. Don't ask, but so far I've never been wrong with RC paper (track record isn't quite as good with Fibre).
Under the safelight I showed them the 8x10 paper I was going to use (Ilford MGIV Satin RC) and how it has two sides.  The matte rough side, which is the back, and the smooth shiny side that is for printing.  They got to feel it and thought it was really cool!
Loading it into my Easel I turned off the safelight and said, okay now we do the print!

I flipped the switch on the timer and told my littlest to stand beside his big brother (who was still sitting) so he could see what was happening.
As the timer silently clicked down to 0 I told them that the next part will be like magic.
The room went black again....  I flipped on the safelight and pulled the paper out of the easel and told them to stand up and stand over beside the developing tray.

Here comes the magic....

I put the paper into the developer and started rocking the tray gently... back.... and forth..
10 seconds... back and forth...
20 seconds... back and forth...

Then the magic happened.... The image started to come to light and the kids expression... "wow!  I see it, daddy... I see it!"
30 seconds...

And for almost 2 minutes in the developer the image was finally done...

Into the stop for 10 seconds and finally the fix for 5 minutes...

The lights came on and the kids were amazed at the magic of the print..  After explaining to them how it all works and explaining to my eldest how two negatives create the positive image and why you get a negative when you shoot film (not that I really expect him to remember it) I dumped the chemicals back into their respective bottles and up to the bathroom to wash the print...

So I showed my kids the process that is more than a century and a half old, and still holds the magic for me today as it did the first time I ever saw a print appear in the developing tray....
Frozen WalkThis print will be a little special for me, as it is the first print I made with my two boys...

Made on Ilford MGIV RC Satin from a negative originally taken on Svema Blue Sensitive film shot on a Canon T90 with a Osawa 24mm ƒ/2.8 lens.  Film developed in Ilfosol-3 1+14 for 6 minutes...

Until next time, keep those shutters firing!

Saturday, March 1, 2014

Eastman 2366 Duplication Film

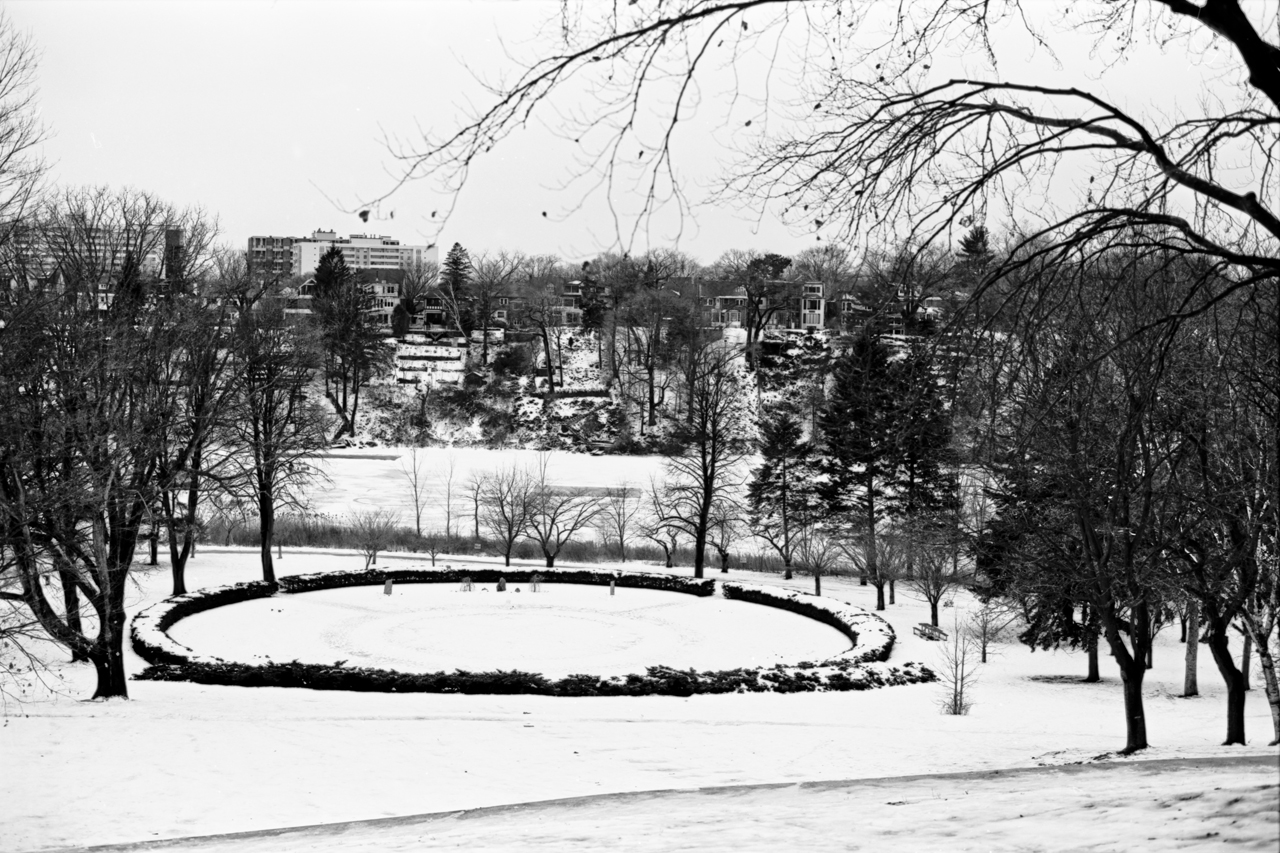
I was given a couple of rolls of Eastman 2366 B&W Panchromatic film, which is a high contrast film for titles, and not actually intended for use as a pictoral film.  That said, however, it works very nicely in a 35mm camera, and will give you some serious contrast!  Of course, it also can be tamed using the proper techniques.  I have not yet managed to fully tame it, as of yet.

I am still working on that.

So I gave it a whirl in Rodinal 1+50 at ASA 6..


For some very smooth chromey silver type of look, it is excellent.  It has some of the finest grain I have seen, short of ADOX CMSII, and some incredibly rich tones.
Of course, this is not Polypan film, and seems about right with ADOX CMSII for gray tones at a similar ASA speed.
That said, however, it does have a bit higher contrast.
I shot the CMSII in my Bolsey B2 at the same speed, and found that the CMSII film's contrast was a bit more even, but barely.  It didn't quite clip to blacks or whites as quickly as this film does.  Then again, that could be a number of factors, such as light conditions, weather, and even just the time of year.
When I shot the CMSII at EI6 I shot it during the summer, while this film was shot in the winter, so you're going to get a little bit higher contrast, especially with snow on the ground!

Nevertheless, I will try this film again, perhaps a roll from my good friend John, who I managed to snag him into buying a bulk roll of this (sorry) after I gave him a roll to try out.
He absolutely loves the film.
Check out his blog post on it.

So far I am enjoying this film, and do have to try it behind some filters.  Perhaps yellow?

Until next time, keep those shutters firing!

All images taken using a Canon T90 35mm SLR using a 50mm ƒ/1.4 FD lens on Eastman Fine Grained 2366 film and developed in Rodinal 1+50 at 20°C with a 'slow' agitation regimen.


Thursday, February 27, 2014

Returning To Kodak

This year I have decided to shoot a lot more 4x5 film.  That means much less shooting, and more concentration on making sure that the shot counts!
Using my Calumet CC400 Monorail is not the easiest camera to use in the field.
Alright, lets face it, it is downright near on impossible, but I do it!  I get it into the field all the time that I can and use it.  Whether it is a wide-angle, standard, or a telephoto lens, I just find it most relaxing.

I have entirely dedicated this year to three film stocks.  FP4+, HP5+ and Fomapan 400.  I love all three films, but have a preference to HP5+ just because it is such a gorgeous film!  That said, however, I cannot deny the classic emulsion of Fomapan 400, and the wonderful contrast of FP4+.

I returned to the Kodak Plant here in Toronto, well at least what is left of it.  I spent a fair amount of time here in the past, and plan on revisiting it again, this time with more film, and possibly some EKTAR 100 and Provia 100 for some of the desolation and using my ultra-wide angle lenses.  Although those Ultra-wides aren't QUITE up to 4x5 snuff, but really damn close enough to work.  Those lenses would be the ones I pulled off a pair of Kodak Brownie folders, and one off a Agfa Billy Record.  Some 105mm lenses off the Billy Record, which normally covers 6x9 beautifully, but actually gives some really lovely coverage on 4x5 film as well.

I wandered into the plant and had one shot in mind.  The front foyer and stairs.  Once a grand entrance, with beautiful brasswork and wood rails and marble stairs, they now lay in complete ruin and are no longer the joy they must have once been to look at.

I visited this place recently with my Kodak Signet 35 and Kodak Gold film during my previous 52-rolls and made it the finale to the Month of Kodak in March of 2013.  This time however, I will be entirely dedicating my time to 4x5 film.    As such, a month of Kodak would entail using ONLY Kodak Film with a Kodak lens.  Since I have not committed to Kodak film this year, that will have to pass.
I wish I had +Mathew Marrash's Kodak Commercial D 8x10 camera with one of his gorgeous Field Ektar lenses, but alas, I do not.

My wife, +Donna Bitaxi, worked for Kodak many years ago at this very facility.  But when they decided to consolidate their chemicals into a third party company, and began the shift away from traditional B&W photo papers, their plant closed.  My wife, offered a position and moving expenses to travel to a different location in British Columbia, declined the offer, and stayed in Toronto, where she eventually met me.
She worked in the Black and White Photopaper packaging department, and like many of us, spent plenty of time under a red Safe-Light.

Sadly, in 2005, this plant closed its doors for good.  In late 2006 the demolition companies were called in and within a couple of short years the plant, save for Kodak Building #9, was erased from the map forever.
Who owns this land and the last building upon it, I do not know, but it is a place for firebugs, graffiti artists, vagrants, and Urban Explorers.  I took a few Digital Images where I was there this time, as I had my Rebel XS and 50mm lens, and figured it would be the best choice to capture some quick shots.

Image taken on a Calumet CC400 4x5 Monorail, Kodak Ektar 127mm ƒ/4.7, Ilford FP4+ 125 @ 125ASA under natural light.  Exposure 8s at ƒ/8.  Metered for a 4s exposure and added 4s for Reciprocity.
Today, this is what the stairwell looks like.  Crumbling, broken, and ruined.  A sad testament to what it once was, and possibly what lies ahead for the Film Giant in the future.

Until next time fellow bloggers... Keep this shutters firing!

Wednesday, January 29, 2014

My Deardorff

I haven't been posting much in here as I have been busy with, well, life.  Not through any lack of desire to post, just haven't had time or a chance to.
The one thing, though, is that I have started a much needed repair and refurbishing of my late grandfather's Deardorff 5x7 Wooden Field camera.  I don't think he ever used this camera, as I have sifted through his negatives and there were many 620 6x9 negatives, but nary a single 5x7 negative.  No back and ground glass, or lens board or lens came with it.
So I am having to do a lot of the work by fabricating parts, or buying from the Deardorff factory in the USA.

So far I have made a new lensboard for it, and realigned the focusing racks.  I am in the processed of acquiring new hardware for it, and making a new front focusing rack for it so that I can have it a little more sturdy.

As it stands now, it is not yet usable.  Without the rear ground glass and film holder, I am unable to use it to take a single image.
Hopefully within this year I will have the camera in service again finally.  But as of now, here is how it looks..


The lensboard is not yet finished, as I have to sand it smooth, add another coat of paint, sand that again smooth, using some 600+ grit sandpaper, then protect it with some clearcoat lacquer.
The lens is off a Kodak Autographic Folding Brownie Hawkeye No. 2A.

Very impressive lens indeed!

Until next time, fellow bloggers...

Keep those shutters firing!

Sunday, January 19, 2014

When Things Go Wrong...

I shot a roll of Fujichrome Velvia 50 back in August on my Canon AE-1.  It was a bulk roll, and was loaded into a KODAK GOLD 400 35mm canister. So perhaps that was error #1...
Error #2 was not adding a sticky label to the can to say, "E6 VELVIA" on it, but hey, I shouldn't have to!  I've dropped off bulk-loaded film before without a problem.

Error #3 was using a chain lab instead of a pro-lab.

But hey, they're inexpensive, and I hadn't had a problem before..


Tripping

So this, perhaps, is one of the worst images from the roll.  There is no tweaking it to get proper colouration from it.  The shadows are green, magenta grass and a purple sky.
I mean, LOMO Purple isn't even like this.  It's more of a subdued "purple" cast to the film, while this is just completely buggered.

I am so upset about this, as it was a irreplaceable roll.  The conditions, light, location, and time was perfect when I shot these.  I don't see myself driving back to this location, because frankly, I cannot actually remember where this location is.  It's too bad, I really wanted these slides!

I should, at one point, head back to Blacks (where I took it) and make a proper formal complain about it.
But since they do not sell Velvia 50, what the hell can I really do?
Technically speaking, they own me $40.00 for the film (at least)..

Nonetheless, lesson learned.  Next time I will make 100% sure it is properly labelled and that there will be no mistakes!

Until next time, fellow bloggers.

Keep those shutters firing!

Monday, January 6, 2014

Positively Speaking..

Last month Michael Raso of the Film Photography Project sent me a care package of some specialty films that might be coming to your FPP store for sale.
One of the films is this Kodak #5363 Positive Cinecopy film.  I was challenged by +Alex Luyckx  to shoot and process as a positive image instead of as a Negative.
Well, I just happen to have a B&W reversal kit from Kodak that I've been playing around with.  So I used a HC-110 Dilution that the lovely and very friendly Leslie Lazenby of Imagine That! in Findlay Ohio.  Oh, and The Mecca.
HC-110, the soup of Ansel Adams, Dilution G (1+119 from syrup) for 15:00 since I shot it at EI 6, as we are still unsure as to what speed this film really is.
Well, after mixing up the Bleaching bath (1 part Sulfuric Acid Concentrate to 1 part Potassium Permaganate to 3 parts water).. so 75mL of each part of the bleach to 250mL of water and I had slightly UNDER mixed it by 50mL of water, but no problem, I got to business.

Putting the film into the soup and developing it for 15:00 I got my next bath out.  The Stop Bath.  Yes, I used an ACID stop bath before I put the bleaching agent in, even though it is a highly concentrated Acid, so the developer wouldn't contaminate the bleaching agent.  After mixing it in the bleach for a good 2 minutes it was then clear of all developed silver, and ready for the clearing bath, which is basically concentrated Sodium Bicarbonate (Baking Soda) which negates the acid and clears the yellow stain from the film.  Oddly enough, though, the stain didn't quite vanish, and I wasn't very impressed it was still there!
But ... whatever, it's all good!
After the clearing bath, it's a rinse then off the reel and reexposure to light.
So holding up to the light, I rexposed the film for 30 seconds, and popped it back onto the developing reel for final stage.
DekTOL.  Yup, good ol' Kodak Dektol STOCK dilution.  Just dump it on the film and agitate it until it is all developed.  This is done in the light, obviously, and once developed, you pop it under some water and give it a good long washing.
Hypo, if you have it, wash, and then Photoflo.
After a good 10 minutes under running water, I added the Photoflo mix, and let it stand for 2 minutes.
After letting it stand for a couple of minutes, I dumped the solution and hung the film to dry.
That's when I made an inspection of the film.

It looked pretty good.  A little foggy, and that is something I thought was odd, considering that it should be nice and clear.

Either way, they looked good to me!  Not quite as good as the Foma 100R I developed, but pretty good.


So there they are.. The slides that I scanned.  Not a lot came out great, but the majority worked.  I still need to work on proper exposure, and next time I do this I think I'll try at a more expected exposure, perhaps 25ASA and in HC-110 G for 25 minutes.
Aside from that, the film was well exposed and had very good images on it.
Just upset that the film was a little... foggy.

Exakta Varex
Steinheil Munchen Lithagon 35mm ƒ/3.5
Kodak 5363 Cinecopy Film @ EI6
HC-110 Dil. G (1+119) 15:00
Bleach
Dektol Redeveloper

Scanned on Epson Perfection 4990

Thanks for reading!

Until next time fellow bloggers, keep those shutters firing!

Saturday, January 4, 2014

Pushing or Pulling - Welcome to Film

So I have noticed a common question, and that is.  Push or Pull.

What is Pushing and pulling?  Can it be done with Digital, or is it a strictly film practice?

Well, the answer to that question is... well, yes and no.  Can you push a digital image, you can.  But that is all done in post processing, and requires a lot of patience.  And, like film, will work a similar way, but instead of accented grain, you get accented noise.  More often than not, it doesn't look very appealing on digital, where as on film it can look pretty good!
With a lot of patience and care you can do it with a digital image.
Lets take this image, for instance..
Under exposed, but not too badly.  Say 2 stops under, which is easily worked with.  So after a bit of level tweaking in Photoshop, and having to up the contrast a bit to keep it from looking washed out, here's the image..


So now you can see more detail inside the bus, and even behind and around it.
This is essentially similar to PUSHING film.  You can see the highlights have also started to get a fair bit stronger and it is a higher contrast.
But, in areas that had no exposure, such as under the bus, behind the driver, and around the houses in the b/g, they are still in shadow. Since there is no exposure, there is no information to bring out.
Now how does this relate to pushing a film?  Well, lets take that the image was about 2 stops under exposed.  That's because I set the cameras ISO setting to 200 so that I would get a smooth motion on the vid screen of my phone to compose it.  I chose a phone image over a dSLR as, for one I had no under exposed image for my dSLR, and 2, this image is probably one of the better images to use for explaining a push.

So what did I do to "push" this image?
well, first off I changed the curve to bring out more of the midtones and started to try to draw out the shadows.  In doing so I caused the image to feel... well washed out and unbalanced.  So I had to increase the highlights, and when I did that the image looked better but it just didn't have the right balance, as it was definitely washed out with light shadows, smooth midtones, and highlights that were strong, but seemed to blend too much with the mid-tones..
SO I had to increase the contrast.  This is where it starts to resemble a pushed film.  The shadows stay dark, as they are supposed to, instead of a 18% gray, or a darker gray shade, and the highlights start to feel a little over powering.  The problem is, if you scale back the highlights, they actually become dull, and blend with the mid-tones, and the image feels flat.

So in theory, yes, you can push a digital image,.
So what about pulling a digital image?

This is where film and digital actually start to slip apart.  Pulling a digital image is far more difficult, as the highlights are going to lose detail far faster than the shadows will.
This is where Latitude starts to come into play, and where film starts to win the fight.  At least, Negative film. Not a FILM vs Digital post, I'm explaining Pulling and Pushing.   I have explained PUSHING with a positive image in a digital sense, and now pulling.
See, when you pull an image, you are actually halting the development of the highlights after over exposing the image.  This is the tricky part with digital.  It is also tricky with E6 films, which are a positive image similar to Digital.  The only thing is, with an E6 film, prior to developing the film, you can decide on how to develop it.
Wth positive film that is over exposed a stop or 2, and you pull it, you keep the highlights from developing to the point of clipping, and create a smoother contrast over the image.
This is the point where digital cannot compare...  to work around this, photographers develop an HDR image, which stands for "HIGH DYNAMIC RANGE".
The problem is when you see most HDR images, it has the Saturation pumped way up, and it looks like a false image.  See the human eye actually lies to you and what you see.  The brain is so powerful that it will actually adjust the image your eye is seeing and keep the highlights that you see from being just that.  In fact, if you look at a darkened place while in a bright area, no with the sun in your eyes, you can see into that darkened place, so long as you don't have any strong reflective surfaced rebounding harsh lighting into it.
And if you are in a dark area and look outside, good chance that you will be able to see some of the colours of the sky
Your iris will adjust itself against the light.  Narrower for bright, and wider for darkened areas, similar to how the camera works.  But unlike the camera your brain has exceptional corrective abilities that film or digital does not.
So the image you see in an HDR image feels, well, like it is wrong, and that it just isn't how it should be.
But the concept is usually there. The sky is a smooth shade of blue, tapering off toward the grown as a lighter cyan until it makes contact with the Earth.  At that point the shadows are now defined, and you get a good fair amount of detail in the darker areas of the image, without it being washed out or clipped.  Underexposed shadows, or over-exposed highlights just don't exist!
This is how digital has begun the process of how to "PULL" an image, and in doing this, the photographer takes a series of bracketed images.  Say a series of 7 shots.  One being the control, or EI0, 3 at +1 +2 and +3, with the other three at -1 -2 -3..
Using a program light Aperture, lightroom, or Adobe Photoshop they combine these shots and create a layered image.  The photographer then can pick and choose how each layer intertwines and defines each zone.
They can bring Shadows up to Zone IV, while pulling the highlights back to zone VII keeping everything within equal viewing range, and having a smooth contrast image that is not over powering, or under whelming.
That is a whole bunch of added steps to pull a digital image and keep it from being over-exposed, or under exposed.
Take that same roll of E6 positive transparency film that you over exposed 2 stops.  Well, when you pull it in processing, you are halting the development of the
This causes the image to lose contrast, but gain shadow detail and retain the critical highlight detail.  This is very useful when shooting without gradual N/D (Neutral Density) filters, which help against over exposed highlights and keeping the ground and shadows in a more visible range, instead of dark and underwhelming.
highlights, and allowing the shadows to actually catch up!
So that's the idea behind pulling a film.

But all that did was cover Positive film, and not negative film.

Yes, but the theory is the same.  Negative film has a higher (much higher) latitude than Positive films, like E6 and Digital, which sometimes you do not actually have to waste your time with a Push Pull method.
Many modern emulsions have enough latitude to capture a under exposed image, sometimes even up to 3 stops under, or an image up to 3 or even 4 stops over exposed!  And to do all that without a single change in how your developed the film.  It handled it through the latitude of the film itself.
So in a basic nutshell, lets look back at this.  What is Pushing and what is Pulling.
Pushing is the method of under exposing an Image and taking more time to develop it.  With digital, it means fine tuning the curves to try to keep it from being overly noisy, yet still well defined.  Trying to control the contrast, highlights, and not letting the shadows become a gray tone and noisy.
With film it means that you spend more time developing the film.  As pointed out with a digital image, you will not gain shadow detail at all.  You increase the contrast, and brighten the mid-tones and increase the density  of the highlights.  Stronger, brighter, and more dense highlights, while keeping deep and solid shadows.  Where there is no exposure, there can never be exposure, so you can push until the film just stops reacting to the developer, and you will never gain any exposure in the shadows.  Where there is no information, you cannot draw out information.

So lets take a film out there like Polypan F.  This is a 50ASA rated film, so we'll take a look at an image I took at 50ASA, developed normally.  The film is smooth, with even and lovely contrast, and some lovely gray tones that make this film super famous, especially after the promotion and work that myself, and fellow Polypan Shooter and abuser Larry Dressler has done.  The thin base, lack of anti-halation, and polyester backing make this film prone to blooming, which is the spreading of the highlights.
Just look at the head on this pint of beer.
So this is quite a basic image, nothing special.  How does it relate to pushing or pulling?
Actually, quite a lot!  This is showing the film as it is supposed to be. Exposed and developed at box speed, without any extra steps.
So lets say I have only that same 50ASA film and I just went from the bright outdoors to a subdued lighting indoors.
I could;
A) Use a tripod
B) Use a flash
C) Push the film

So I don't have or cannot use a flash.  A Tripod is not an option. and will be rather difficult to use, so I will choose option C.  I will push the film.
How much, is the question.  Lets go with 2 stops so ASA200.
So here is an image I exposed at 200ASA with Polypan F.  Shot indoors, slightly different lighting, and a completely different time of year, but the principle is the same.
Longer time in the tank to develop the mid-tones and highlights.  So the highlights start to get stronger (look at the cup behind the hat, shadows are deeper and the image becomes higher contrast.  Under the hat is black, while the hat itself remains quick evenly toned.  Contrast is also significantly stronger.
This is pushed film.

So lets now recap this entire post on Pushing and Pulling.

Pushing and Pulling is a method that is done at the development stage of processing your film.  It cannot be done before or after the film is processed.

It is through over exposing and under developing, known as pulling, or under exposing, and over developing, which is known as pushing.

So how can you call what I did to the digital image Pushing?  Because it is during the Processing stage of the image, before the final image.  That said, the negative is not the final image, but the Print is.
Working with an under exposed and normally developed negative is very difficult.

When do you use PULLING as a technique?

Well, lets say you load some 400ASA film, but either forget to set the ASA dial, or in the case of AUTO-DX coded cameras, maybe the canister isn't DX coded, or it is a bulk loaded can.  The ASA setting on the camera is slower than the loaded film, and when the images are all shot on the roll, they are over exposed.
Then you'd consider pulling.  Some films that is unnecessary for 1 or 2 stops, while others it is very necessary to prevent over exposed and overly dense negatives.

The other reason is to control contrast in high contrast scenes, like say a beach or a snowy landscape.  Or perhaps to reduce the contrast of a high contrast film, like Microfilms.

There are many reasons to pull a film, and some are employed by large format photographers who use the "ZONE" system.

What about pushing a film?

Pushing a film, well, similar idea.  You load a slower film and require a faster one, or forget to reset the speed dial and leave it faster than the film loaded, or the DX coding isn't set.  This is when you'd consider pushing a film, or to gain contrast in lower contrast films.
Even photographers who use the Zone system will also push a film

So in a basic nutshell, that is pushing, and pulling, film.
It is not quite as complicated as all the above, but it sometimes requires more explanation than just;

PUSH = UNDER EXPOSE OVER DEVELOP
PULL = OVER EXPOSE UNDER DEVELOP

Sometimes you'd like to know when to apply such techniques, or why people employ such techniques.

Until next time, Keep those shutters firing!

Friday, January 3, 2014

The Sharpest Film - PART II

So for an ongoing saga in this "SHARPEST FILM" I will continue to test films that claim to be "THE SHARPEST" films.
Kodak claims that TMAX400 is the sharpest 400 speed film, so I will put it up against TRI-X, HP5+, Delta400, Kentmere 400 and Rollei 400.  I will skip Foma 400, because I already know it'll lose badly. Beautiful tones, absolutely, but not exactly a sharp sharp film.

Anyway, this is about ADOX CMSII at ASA 3 instead of ASA6.  I have tested it at 6, and loved the results, so here's the film at ASA3.


But that's not the most interesting thing about this film.  The detail and entire lack of grain, even under such a huge crop, just shows how amazing this film is.
If it didn't cost so much in 4x5 I'd order a box.


Even under such magnification I can see no grain, and there is still very recognizable detail.
Absolutely a film that I will definitely be getting more of, and since I'm essentially all done testing it, shooting it without considering it to be "test" shots only.

Until next time fellow bloggers, keep those shutters firing!

All images were exposed at EI3 which is a 2 2/3 stop pull.  Film was developed in Rodinal 1+200 at 20°C  (68°F) for 10:30 using standard agitation.

Saturday, December 28, 2013

The Sharpest Film

So 2013 isn't over yet, and I'm posting another blog post, this one about one of the best films I have ever shot, when it comes to Sharpness.
Being a Microfilm that is designed for extreme amounts of reduction it needs to be a very powerfully resolving film.  I mean, it's stupid sharp!  SHARP SHARP SHARP!
So I have shot this before with disappointing results.  It's a 20ASA film in Adotech developer, and is usable in that developer at 20, but developing it in, say, TMAX developer, or HC-110.. Forget it!
For that you need to pull it.  So lets say 6ASA, which is what I shot it at, and it's beautiful!

So I got a roll from John Meadows.  He and I have been trying to crack this film for a while now, and I am happy to say, I think I have managed to do so.
Without using something like the specialized ADOTECH developer, which is rather pricey, and getting usable results, I tried Rodinal.

Rodinal is a great developer.  Very high acutance, sharpness, and beautiful tonal range.  It is like the magic of film in a liquid package.  It's easily one of the very best developers... ever!  It's liquid magic...!

Anyway, enough praise of Rodinal....  It deserves it, but here's the ADOX CMSII 20ASA film rated for 6ASA in Rodinal 1+200 developed for 12:00..


Images were taken down in the Beach area of Toronto, at the Victoria Park and Queen Street Water Processing Plant.

All images taken on a Bolsey B2 35mm Rangefinder, with a Wollensak 44mm ƒ/3.2 lens and developed in Rodinal 1+200 for 12:00 using standard agitation.

Until next time fellow bloggers, keep those shutters firing!

Saturday, August 31, 2013

Super Novar Sharpness

Every time I use my Nettar, I get a little smile on my face.  It is so sharp!  Scale focusing, also known as zone focusing, is a tricky endeavor, but so worth it.
The Nettar 517/16 is a brilliant camera.  Sure it just has a viewfinder, and no rangefinder, but I bought mine from the original owner.  He got it new back in 1949, and it served him well over the years.
He was 76 years old, back in 2010, making him only 15 when he got it for his birthday.
He had a lot of fond memories of that camera, but didn't use it anymore, so he put it up for sale.
Originally asking $60, he sold it to me for $40, provided I actually used it.
I promised it would be used, and it has been!  Sure, not to the same degree that it should be used, but it is used....


All images take on the Zeiss Ikon Nettar 517/16 with Ilford Delta 100 film and developed in Rodinal 1+100 for 60:00 semi-stand, with a slight shake at 30:00